Category Archives: Coding Tutorials

Coming Soon Page :: PSD Sitebuild

Your ads will be inserted here by

AdSense Now!.

Please go to the plugin admin page to paste your ad code.

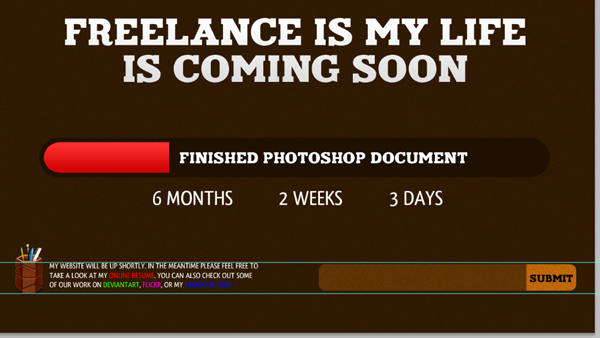
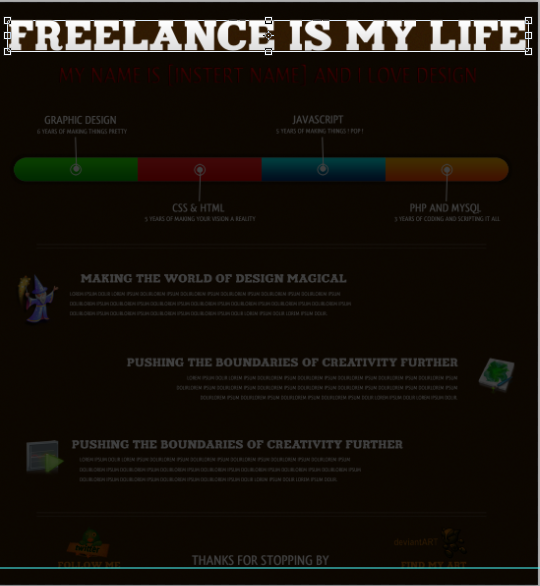
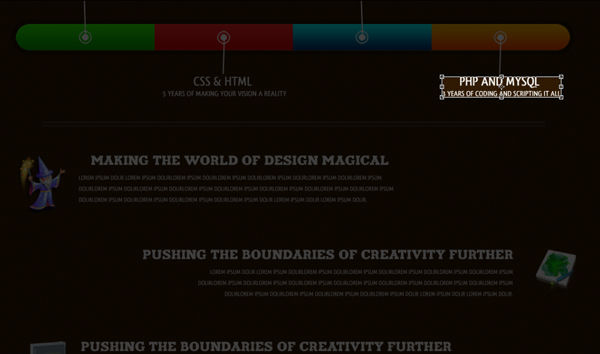
Today we will be entering the third step of our Beginning to End Series, coding our Coming Soon Page. If you haven’t viewed the photoshop tutorial you can view it here.


Set up your folders like such:
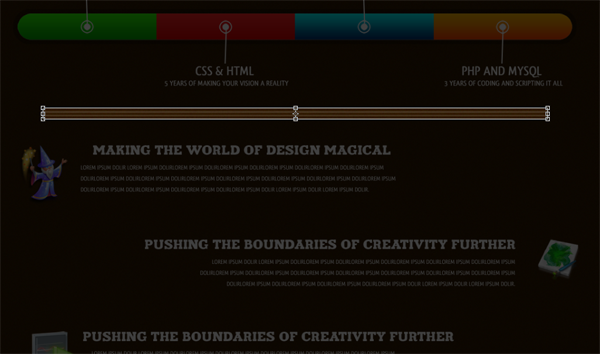
Slicing The PSD

We need to start out by slicing the PSD. For our coming soon page we only have a little bit to slice. We need to slice the submit button, the social network navigation buttons, and a portion of the background for repetition, and the full background.I always like to save my images as a PNG and optimize them for the web through photoshop. There are times when you need to use JPG but for most cases PNG will work the best. JPG should be used only when the image needs to be high quality, such as a photograph.

Coding Our Document

Now that we have our document images sliced it is time to start coding our document. First we will set up the start of our HTML document.

<!DOCTYPE html PUBLIC "-//W3C//DTD XHTML 1.0 Transitional//EN" "http://www.w3.org/TR/xhtml1/DTD/xhtml1-transitional.dtd"> <html xmlns="http://www.w3.org/1999/xhtml"> <head> <meta http-equiv="Content-Type" content="text/html; charset=utf-8" /> <title>:: We Are Coming Soon ::</title> <link href="style.css" rel="stylesheet" type="text/css" /> </head>  <body>

Now it is time to set up our CSS file before we move on to the rest of our document. As you can see in our HTML heading we will be using a separate style sheet titled style.css

@charset "utf-8"; /* CSS Document */ body {  background-image: url(Images/backgroundrepeat.png);  background-repeat: repeat; } h1 {  font-family: "Cooper Black";  font-size: 68px;  color: #FFF; } .content {  background-image: url(Images/background.png);  background-repeat: no-repeat;  float: left;  height: 768px;  width: 1280px;  margin-right: auto;  margin-left: auto;  margin-top: 0px; } .contenttext {  float: left;  height: auto;  width: auto;  margin-top: 160px;  margin-left: 60px;  font-family: "Cooper Black";  font-size: 30px;  color: #FFF; } .newsletter {  clear: none;  float: left;  height: auto;  width: 755px;  margin-top: 25px;  margin-left: 60px; } .field{  float:left; }  .field input{  /* The text boxes */  font-family:Arial,Helvetica,sans-serif;  font-size:22px;  background:url("img/box_bg.png") repeat-x scroll left top #FFFFFF;  outline:none; /* Preventing the default Safari and Chrome text box highlight */  -moz-border-radius:10px;  -webkit-border-radius:6px;  border-radius:6px;  padding-top: 8px;  padding-right: 5px;  padding-left: 5px;  padding-bottom: 8px; }  .signupButton{  /* The submit button container */  text-align:center;  float: left;  padding-right: 0;  padding-bottom: 10px;  padding-left: 0;  padding-top: -10px;  margin-left: 15px; }  #submit{  /* The submit button */  cursor:pointer;  height:54px;  text-indent:-9999px;  text-transform:uppercase;  width:170px;  background-image: url(Images/signup.png);  background-repeat: no-repeat;  border-top-width: 0px;  border-right-width: 0px;  border-bottom-width: 0px;  border-left-width: 0px;  border-top-style: none;  border-right-style: none;  border-bottom-style: none;  border-left-style: none; } .socialnetworking{  clear: both;  float: left;  margin-left: 70%;  margin-top: 115px;  font-family: "Cooper Black";  font-size: 24px;  color: #FFF;  white-space: normal;  width: 303px; } -->

Our CSS starts out with the body tag which will use our sliced portion of the background to repeat on a larger screen. It then details our content to use our full sliced background image as the divs bg image. By setting the left and right margins to auto we are centering the div on a screen larger than 1280 wide. You must specify the width of a div if you are to use auto margins to center a div.

Your ads will be inserted here by

AdSense Now!.

Please go to the plugin admin page to paste your ad code.

We are using CSS3 for our coming soon page; which means that this page will render differently in IE than it will in Firefox, Chrome, and Safari. Luckily CSS3 is going to be supported in IE9 which will help to maintain Cross Browser Compatibility.

Now we will set up the remainder of our HTML document to give our welcome text.

  <!DOCTYPE html PUBLIC "-//W3C//DTD XHTML 1.0 Transitional//EN" "http://www.w3.org/TR/xhtml1/DTD/xhtml1-transitional.dtd"> <html xmlns="http://www.w3.org/1999/xhtml"> <head> <meta http-equiv="Content-Type" content="text/html; charset=utf-8" /> <title>:: We Are Coming Soon ::</title> <link href="style.css" rel="stylesheet" type="text/css" /> </head>  <body> <div class="content">  <div class="contenttext">  <h1>We Are Coming Soon</h1>  We are releasing a new website on [date here]. <br />Please keep checking back or sign up for our <br />newsletter and we will let you know!</div>

It is now time to set up our newsletter. The first thing that we will do is set up our form.

 <div class="newsletter">     <form action="MailForm.php" method="POST"> <input type="hidden" name="recipient" value="[email protected]"> <input type="hidden" name="subject" value="Coming Soon Signup"> <input type="hidden" name="redirect" value="thankyou.htm"> <input type="hidden" name="required" value="email"> <input type="hidden" name="errorpage" value="error.htm"> <div class="field"> 	        <input name="email" type="text" id="email" size="45" /> </div>     <div class="signupButton">       <input type="submit" name="submit" id="submit" />     </div>     </form>

As you can see we detail a few things at the start of our form. You must put in your email address, the subject title, the link to the thank you page, and the link to the error page

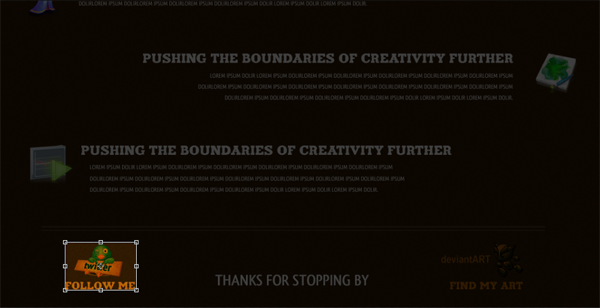
Now that we have finished up our signup aspect of the HTML it is time to set up our Social Networking. We will simply be using the images for our social networking. You can view this tutorial to learn how to make them pop-up on rollover.

Here is our final HTML including the newsletter:

 <!DOCTYPE html PUBLIC "-//W3C//DTD XHTML 1.0 Transitional//EN" "http://www.w3.org/TR/xhtml1/DTD/xhtml1-transitional.dtd"> <html xmlns="http://www.w3.org/1999/xhtml"> <head> <meta http-equiv="Content-Type" content="text/html; charset=utf-8" /> <title>:: We Are Coming Soon ::</title> <link href="style.css" rel="stylesheet" type="text/css" /> </head>  <body> <div class="content">   <div class="contenttext">     <h1>We Are Coming Soon</h1>   We are releasing a new website on [date here]. <br />Please keep checking back or sign up for our <br />newsletter and we will let you know!</div>   <div class="newsletter">     <form action="MailForm.php" method="POST"> <input type="hidden" name="recipient" value="[email protected]"> <input type="hidden" name="subject" value="Coming Soon Signup"> <input type="hidden" name="redirect" value="thankyou.htm"> <input type="hidden" name="required" value="email"> <input type="hidden" name="errorpage" value="error.htm"> <div class="field"> 	        <input name="email" type="text" id="email" size="45" /> </div>     <div class="signupButton">       <input type="submit" name="submit" id="submit" />     </div>     </form>   </div>   <div class="socialnetworking"><img src="Images/twitter.jpg" width="99" height="51" border="0" /><img src="Images/facebook.jpg" width="100" height="51" /><img src="Images/myspace.jpg" width="101" height="51" /></div> </div> </body> </html>

Creating the Mail Form PHP File

<?php if ($_POST[recipient] && $_POST[subject] && $_POST[redirect]) {    if ($_POST[required]) {     $rfields = explode (",",$_POST[required]); 	foreach ($rfields as $check) { 	  if (!$_POST[$check]) { 	    header("Location: ".$_POST[errorpage]); 		exit(); 	  } 	}   }    if ($_POST[autoresponse] && $_POST[email]) {     $html = file_get_contents($_POST[autoresponse]) or die("<b><font color="#ff0000">Not a valid autoresponse page...</font><b>"); 	if ($html) { 	  $tit_start = strpos($html,"<title>")+7; 	  $tit_end = strpos($html,"</title>")-$tit_start; 	  $mailsubject = $html; 	  $mailsubject = substr($mailsubject, $tit_start, $tit_end); 	  mail($_POST[email], $mailsubject, $html, "From: $_POST[autoresponsefrom]<$_POST[recipient]>rn"."MIME-Version: 1.0n"."Content-type: text/html; charset=iso-8859-1"); 	}   }   else if (!$_POST[email]) {     echo "<b><font color="#ff0000">Email field required when using autoresponse mail...</font></b>";     exit();   }    $ndata = array("recipient","subject","required","errorpage",);    $postfields = $_REQUEST;    foreach ($postfields as $k => $v) {     if (in_array($k,$ndata)) unset($postfields[$k]); 	else $msg .= $k.": ".$v."n";   }    mail($_POST[recipient],$_POST[subject],$msg,"From: $_POST[email]rn"."Reply-To: $_POST[email]rn");   header("Location: ".$_POST[redirect]); } else echo "<b><font color="#ff0000">Recipient, subject or redirect field is missing...</font></b>"; ?>

Finalizing The Coming Soon

Now we have to create the Thank You and Error Pages. Here is the HTML for the Thank You Page, which should be saved as thankyou.htm

 <!DOCTYPE html PUBLIC "-//W3C//DTD XHTML 1.0 Transitional//EN" "http://www.w3.org/TR/xhtml1/DTD/xhtml1-transitional.dtd"> <html xmlns="http://www.w3.org/1999/xhtml"> <head> <meta http-equiv="Content-Type" content="text/html; charset=utf-8" /> <title>Coming Soon :: Thank You ::</title> <link href="style.css" rel="stylesheet" type="text/css" /> </head>  <body> <div class="content">   <div class="contenttext">     <h1>Thank You!</h1>   Thank you for submitting your email. We will<br />   send you an email as soon as the site is ready and<br />you will have first access!</div>  <div class="socialnetworking"><a href="#"><img src="Images/twitter.jpg" width="99" height="51" border="0" /></a><a href="#"><img src="Images/facebook.jpg" width="100" height="51" /></a><a href="#"><img src="Images/myspace.jpg" width="101" height="51" /></a></div> </div>  </body> </html>

Our HTML page for the error page is very basic for something like this. As long as they enter their email address they will not have an error. So here is our error page:

 <!DOCTYPE html PUBLIC "-//W3C//DTD XHTML 1.0 Transitional//EN" "http://www.w3.org/TR/xhtml1/DTD/xhtml1-transitional.dtd"> <html xmlns="http://www.w3.org/1999/xhtml"> <head> <meta http-equiv="Content-Type" content="text/html; charset=utf-8" /> <meta name="keywords" content="rye, country home realty, real estate, 0 lawrence dr, rye colorado real estate, rye real estate " /> <meta name="description" content="Rye Country Home Realty is your first stop for all real estate needs in Rye, CO" /> <title>Untitled Document</title> </head>  <body>  Your application has an error on it. Please return to the Page and try again. Thank You! </body> </html>


Finishing It Up

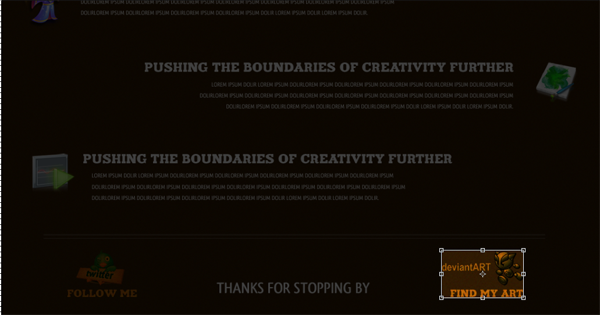
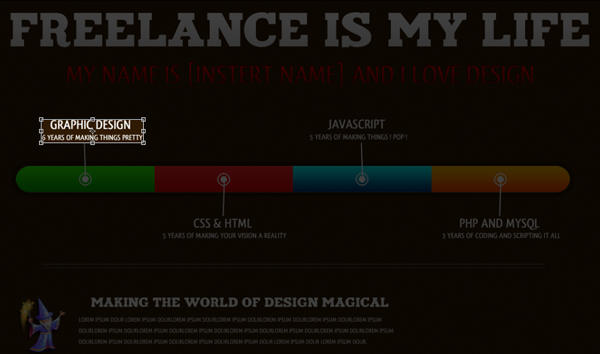
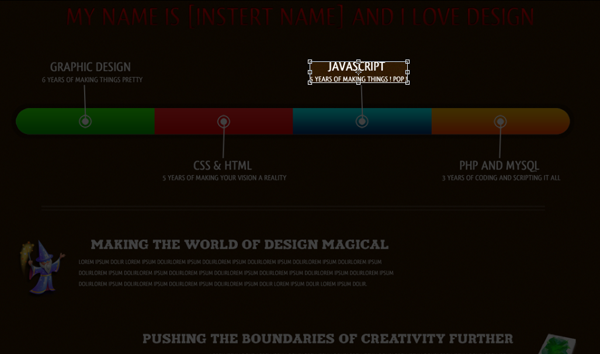
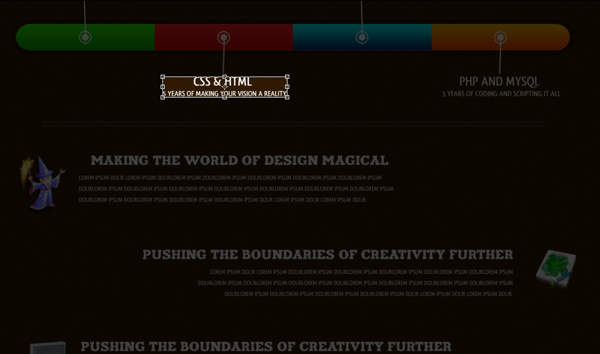
Now that you are finished you just need to upload your files. You should have something like this:

Your ads will be inserted here by

AdSense Now!.

Please go to the plugin admin page to paste your ad code.

HV-Tumblr Theme Pt. III – PSD2HTML Conversion

Your ads will be inserted here by

AdSense Now!.

Please go to the plugin admin page to paste your ad code.

Today I am proud to bring you guys Pt. III of the HV-Tumblr Theme Series. This episode in the series we will finally begin coding up our document. In order to create the perfect Tumblr Theme you need to make sure that your HTML is full stable with filler content before starting to add the Tumblr tags and removing things we don’t need, which is what we will be doing today! Let’s get started…

So, first thing is first, I am going to save us a bunch of time. Instead of wasting your time by showing you what you need to slice up for our document I will just provide the images. It is pretty obvious, especially in this design, to see that we are only going to be slicing up a few images, and the rest we will do with CSS.

Download Image Files

Alright, let’s get started coding up our main page to HTML. The first thing we are going to want to do is set up our folder layout. Create a new folder on your desktop and name it whatever you want. Now, within the folder, we are going to set up an images folder. Copy and paste the images that you downloaded above into the images folder and we are ready to rock and roll.

Open up your favorite text editor, or the editor that you choose/have to use, and right away save your document as index.html. That get’s that out of the way and makes sure that we have at least our open document and saved.

As I said earlier this tutorial, since it’s not the most important part of why I am writing this series, will be a pretty quick tutorial. We are going to be hitting everything in series, and all the numbers that you need are provided in your PSD document (which are provided in Part 1 of this series) so I am not going to explain where the numbers come from to save us both time.

Now, let’s start our first section.

Header and Logo

Alright, for our logo we are going to want to set it up to use just a text based logo. In the conclusion of this series though I will show you a few tips for adding an image via Tumblr custom forms. Anyway, let’s set up our CSS for our header and logo.

1
2
3
4
5
6
7
8
9
10
11
12
13
14
15
16
17
18
19
20
21
22
23
24
25
26
27
28
29
30
31
32
33
34
35
36
37
38
39
40
41
42
43
44
45
46
47
body {
    background-color: #cecece;
    margin: 0px;
}
p, h1, h2, h3, h4, img, a {
    margin: 0px;
    padding: 0px;
    text-decoration: none;
}
.header_container {
    background-image: url(images/header_background.png);
    background-repeat: repeat-x;
    height: 100px;
    width: auto;
}
#header {
    height: 100px;
    width: 1024px;
    margin-right: auto;
    margin-left: auto;
}
#logo {
    float: left;
    height: 40px;
    width: 185px;
    margin-top: 20px;
    margin-left: 55px;
}
#logo h1 {
    font-family: "Francois One";
    margin: 0px;
    color: #a2d9ff;
    font-size: 32px;
}
#logo h1 a {
    color: #a2d9ff;
    font-size: 32px;
    text-decoration: none;
}
#askme {
    background-image: url(images/ribbon.png);
    background-repeat: no-repeat;
    height: 54px;
    width: 37px;
    float: right;
    margin-right: 55px;
}

We have, of course, set up a simple CSS reset and our body information, but we also set up our header and logo information, as well as the quick little CSS setup for the ask me ribbon we put in this design. The thing I want to point out quickly is the reason I have a header container and and then a header class. When you are working with a design like this, and using a background image, you want to split up anything that needs to be repeated, but still has areas that need to be contained, you want to make the repeatable background its own container.

Sweet! Now let’s move on to actually setting up the html. As you can guess we will have a bunch of div tags inside of the main header_container div.

1
2
3
4
5
6
7
8
<div class="header_container">
  <div id="header">
    <div id="logo">
      <h1><a href="#">HV-Designs</a></h1>
    </div>
    <a href="#" id="askme"></a>
  </div>
</div>

Content

Alright, let’s go ahead and set up our content now. We will have our content container, which will keep everything centered on the screen, and then we will be setting up our left content container, which will hold all of our posts.

1
2
3
4
5
6
7
8
9
10
11
12
13
14
15
16
17
18
19
20
21
.content {
    height: auto;
    width: 970px;
    margin-right: auto;
    margin-left: auto;
    clear: both;
}
.leftcontent {
    float: left;
    height: auto;
    width: 635px;
    border-right-width: 1px;
    border-right-style: solid;
    border-right-color: #c0c0c0;
}
.postcontainer {
    float: left;
    height: auto;
    width: 585px;
    margin-bottom: 45px;
}

We have all our containers ready to set up, now we have to get them ready for our posts. The html will have open divs for now, until we finish the posts, so don’t freak out when I don’t close the tags I am providing you.

1
2
3
<div class="content">
  <div class="leftcontent">
    <div class="postcontainer">

Alright, time to set up the CSS for our first post type. We will be including the note and date ribbon CSS as well, which we will be using on every post. We will also be setting up our tags for the first time, but that will also be used in every single post.

1
2
3
4
5
6
7
8
9
10
11
12
13
14
15
16
17
18
19
20
21
22
23
24
25
26
27
28
29
30
31
32
33
34
35
36
37
38
39
40
41
42
43
44
45
46
47
48
49
50
51
52
53
54
55
56
57
58
59
60
61
62
63
64
65
66
67
68
69
70
71
72
73
74
75
76
77
78
79
80
81
82
83
.ribboncontainer {
    float: left;
    height: 100px;
    width: 70px;
    margin-top: 25px;
}
.dateribbon {
    background-image: url(images/date_timeribbon.png);
    background-repeat: no-repeat;
    height: 40px;
    width: 70px;
    float: left;
}
.dateribbon h2 {
    color: #a2d9ff;
    font-family: Oswald;
    font-size: 14px;
    text-align: center;
    margin-left: 7px;
    margin-top: 7px;
}
.noteribbon {
    background-image: url(images/date_timeribbon.png);
    background-repeat: no-repeat;
    height: 40px;
    width: 70px;
    float: left;
    margin-top: 20px;
}
.noteribbon h2 {
    color: #FFFFFF;
    font-family: Oswald;
    font-size: 9px;
    text-align: center;
    margin-left: 7px;
    margin-top: 10px;
    }
#photopost {
    float: left;
    height: 415px;
    width: 510px;
    background-color: #FFF;
    border: 1px solid #c0c0c0;
}
#photo {
    float: left;
    height: 315px;
    width: 480px;
    margin: 14px;
    border: 1px solid #000;
}
#photocaption {
    float: left;
    height: auto;
    width: 480px;
    margin-right: 14px;
    margin-left: 14px;
    font-family: Verdana;
    font-size: 16px;
}
#photocaption a {
    color: #de5400;
    text-decoration: none;
}
#photocaption a:hover {
    color: #1da3ff;
}
.tags {
    background-image: url(images/tags.png);
    background-repeat: no-repeat;
    background-position: left;
    float: right;
    height: 19px;
    width: 150px;
    padding-left: 25px;
    margin-top: 10px;
    margin-right: 15px;
    font-family: Verdana;
    color: #989797;
    font-size: 12px;
    clear: both;
    margin-bottom: 10px;
}

Pretty simple stuff but you will notice that I put everything in its own container. I do it because it makes everything flow a little bit better, but I also do it because it’s just something I have to do (OCD) or I feel like my code is just random nonsense. If you are going to be using containers for everything I would recommend shorthanding your CSS and condensing it as much as possible. Don’t know how to do that? Don’t worry, we have a tutorial coming out for that pretty quick like.

Alright, now that I have shamelessy promoted a future post, it’s time to actually move into our HTML.

1
2
3
4
5
6
7
8
9
10
11
12
13
14
  <div class="ribboncontainer">
    <div class="dateribbon">
      <h2>Jan 10</h2>
    </div>
    <div class="noteribbon">
      <h2>129 Notes</h2>
    </div>
  </div>
  <div id="photopost">
    <div id="photo"><img src="images/photopost.png" width="480" height="315" /></div>
    <div id="photocaption">This will be a photo caption here, with a <a href="#">link</a> included to wherever you want. Its also clickable.</div>
    <div class="tags">Photos, Beach, Sand</div>
  </div>
</div>

Your ads will be inserted here by

AdSense Now!.

Please go to the plugin admin page to paste your ad code.

So, we put in the exact text and photo from our PSD file and closed up the post container tag and are ready to rock and roll into the next step. Now that we have our staple CSS classes set up for each of our posts all we have to do is pull all the sizes, colors, borders, etc from our PSD document and basically transfer them over to our document. Be ready for a huge chunk of CSS:

1
2
3
4
5
6
7
8
9
10
11
12
13
14
15
16
17
18
19
20
21
22
23
24
25
26
27
28
29
30
31
32
33
34
35
36
37
38
39
40
41
42
43
44
45
46
47
48
49
50
51
52
53
54
55
56
57
58
59
60
61
62
63
64
65
66
67
68
69
70
71
72
73
74
75
76
77
78
79
80
81
82
83
84
85
86
87
88
89
90
91
92
93
94
95
96
97
98
99
100
101
102
103
104
105
106
107
108
109
110
111
112
113
114
115
116
117
118
119
120
121
122
123
124
125
126
127
128
129
130
131
132
133
134
135
136
137
138
139
140
141
142
143
144
145
146
147
148
149
150
151
152
153
154
155
156
157
158
159
160
#quotepost {
    float: left;
    height: 155px;
    width: 510px;
    background-color: #FFF;
    border: 1px solid #c0c0c0;
    background-image: url(images/quotes_background.png);
    background-repeat: no-repeat;
}
#quote {
    float: left;
    height: auto;
    width: 480px;
    margin-right: 14px;
    margin-left: 14px;
    font-family: Verdana;
    font-size: 18px;
    font-weight: bold;
    color: #de5400;
    margin-top: 30px;
}
#quoteauthor {
    float: right;
    height: 25px;
    width: 200px;
    margin-right: 14px;
    margin-left: 14px;
    font-family: Verdana;
    font-size: 18px;
    font-weight: bold;
    color: #000;
    margin-top: 10px;
    text-align: right;
}
#textpost {
    float: left;
    height: auto;
    width: 510px;
    background-color: #FFF;
    border: 1px solid #c0c0c0;
}
#text h1 {
    color: #DE5400;
    margin-bottom: 15px;
    font-size: 26px;
}
#text p {
    margin-bottom: 15px;
}
#text {
    float: left;
    height: auto;
    width: 480px;
    margin-right: 14px;
    margin-left: 14px;
    font-family: Verdana;
    font-size: 14px;
    color: #000;
    margin-top: 30px;
}
#linkpost {
    float: left;
    height: auto;
    width: 510px;
    background-color: #FFF;
    border: 1px solid #c0c0c0;
    background-image: url(images/quotes_background.png);
    background-repeat: no-repeat;
}
#linkdescription {
    float: left;
    height: auto;
    width: 480px;
    margin-right: 14px;
    margin-left: 14px;
    font-family: Verdana;
    font-size: 18px;
    font-weight: bold;
    color: #de5400;
    margin-top: 30px;
}
#link {
    float: left;
    height: 25px;
    width: 250px;
    margin-left: 14px;
    font-family: Verdana;
    font-size: 18px;
    font-weight: normal;
    color: #000;
    margin-top: 10px;
    text-align: right;
}
#audiopost {
    float: left;
    height: auto;
    width: 510px;
    background-color: #FFF;
    border: 1px solid #c0c0c0;
    background-image: url(images/quotes_background.png);
    background-repeat: no-repeat;
}
#albumart {
    float: left;
    height: 120px;
    width: 120px;
    margin: 10px;
}
#audio_container {
    float: left;
    height: auto;
    width: 500px;
    margin-right: 14px;
    font-family: Verdana;
    font-size: 13px;
    color: #000;
    margin-top: 10px;
}
.audioplayer {
    background-image: url(images/audioplayer.png);
    background-repeat: no-repeat;
    float: left;
    height: 35px;
    width: 210px;
    margin-top: 10px;
}
#audiotext {
    height: auto;
    width: 350px;
    float: left;
    margin-top: 20px;
}
#videopost {
    float: left;
    height: auto;
    width: 510px;
    background-color: #FFF;
    border: 1px solid #c0c0c0;
}
#videopost h1 {
    color: #DE5400;
    font-size: 26px;
    font-family: Verdana;
    margin-left: 15px;
    margin-top: 15px;
    }
#video {
    float: left;
    height: 300px;
    width: 365px;
    margin-right: 72px;
    margin-left: 72px;
    font-family: Verdana;
    font-size: 14px;
    color: #000;
    margin-top: 30px;
    background-image: url(images/video.png);
    background-repeat: no-repeat;
    margin-bottom: 10px;
}

And simply repeat the same process from our first post we set up and we are good to go:

1
2
3
4
5
6
7
8
9
10
11
12
13
14
15
16
17
18
19
20
21
22
23
24
25
26
27
28
29
30
31
32
33
34
35
36
37
38
39
40
41
42
43
44
45
46
47
48
49
50
51
52
53
54
55
56
57
58
59
60
61
62
63
64
65
66
67
68
69
70
71
72
73
74
75
76
77
78
79
80
81
82
83
84
<div class="postcontainer">
      <div class="ribboncontainer">
        <div class="dateribbon">
          <h2>Jan 10</h2>
        </div>
        <div class="noteribbon">
          <h2>129 Notes</h2>
        </div>
      </div>
      <div id="quotepost">
        <div id="quote">You are part of the Rebel Alliance and a traitor. Take her away!</div>
        <div id="quoteauthor">-Darth Vader</div>
<div class="tags">Photos, Beach, Sand</div>
      </div>
    </div>
    <div class="postcontainer">
      <div class="ribboncontainer">
        <div class="dateribbon">
          <h2>Jan 10</h2>
        </div>
        <div class="noteribbon">
          <h2>129 Notes</h2>
        </div>
      </div>
      <div id="textpost">
        <div id="text">
          <h1>This is a text post of some sort!</h1>
          <p>Lorem ipsum dolor sit amet, consectetur adipiscing elit. Nulla nunc nisi, viverra eu ultrices a, tincidunt et eros. Ut convallis malesuada imperdiet. Mauris interdum dapibus tristique. Phasellus nec diam massa. Donec pharetra pellentesque purus, nec consectetur turpis viverra vel. Sed dictum lobortis velit quis feugiat. Vivamus consectetur odio vel dolor vulputate pulvinar. Sed commodo porta volutpat. Cras varius elementum condimentum. </p>
          <p>Cras iaculis, sapien vel congue pellentesque, felis eros tincidunt neque, nec aliquam justo nibh vitae lorem. Nunc vulputate scelerisque accumsan. Nullam pellentesque, orci ut varius eleifend, eros neque mattis lorem, sed faucibus sem ipsum vulputate dui. Nulla consectetur urna id erat dictum non viverra eros pretium. Sed lobortis porttitor nisi vel elementum. Fusce accumsan massa quis sem eleifend quis condimentum lectus bibendum. Donec eget risus ligula, sit amet </p>
        </div>
        <div class="tags">Photos, Beach, Sand</div>
      </div>
    </div>
    <div class="postcontainer">
      <div class="ribboncontainer">
        <div class="dateribbon">
          <h2>Jan 10</h2>
        </div>
        <div class="noteribbon">
          <h2>129 Notes</h2>
        </div>
      </div>
      <div id="linkpost">
        <div id="linkdescription">Awesome Photoshop Tutorials, Tips and Tricks!</div>
        <div id="link">- http://hv-designs.co.uk</div>
<div class="tags" id="links">Photos, Beach, Sand</div>
      </div>
    </div>
    <div class="postcontainer">
      <div class="ribboncontainer">
        <div class="dateribbon">
          <h2>Jan 10</h2>
        </div>
        <div class="noteribbon">
          <h2>129 Notes</h2>
        </div>
      </div>
      <div id="audiopost">
      <div id="audio_container">
      <div id="albumart"><img src="images/albumart.png" width="118" height="118" /></div>
        <div class="audioplayer"></div>
        <div id="audiotext">
          <p>Lorem ipsum dolor sit amet, consectetur adipiscing elit. Nulla nunc nisi, viverra eu ultrices a, tincidunt et eros. Ut convallis malesuada imperdiet. Mauris interdum dapibus tristique. Phasellus nec diam massa</p>
        </div>
      </div>
<div class="tags">Photos, Beach, Sand</div>
      </div>
    </div>
    <div class="postcontainer">
      <div class="ribboncontainer">
        <div class="dateribbon">
          <h2>Jan 10</h2>
        </div>
        <div class="noteribbon">
          <h2>129 Notes</h2>
        </div>
      </div>
      <div id="videopost">
      <h1>This is your video caption </h1>
      <div id="video">Content for  id "video" Goes Here</div>
      <div class="tags">Photos, Beach, Sand</div>
      </div>
    </div>
  </div>

That nice chunk of HTML was brought to you by filler content. Make sure all your div tags are closed off, which they are if you copied the html :)

Right Container

Alright, let’s get started on the right container. The first thing we want to do is open up our Photoshop Document and get our CSS ready by pulling all the information we need from the PSD. Here is our css:

1
2
3
4
5
6
7
8
9
10
11
12
13
14
15
16
17
18
19
20
21
22
23
24
25
26
27
28
29
30
31
32
33
34
35
36
37
38
39
40
41
42
43
44
45
46
47
48
49
50
51
52
53
54
55
56
57
58
59
60
61
62
63
64
65
66
67
68
69
70
71
72
73
74
75
76
77
78
79
80
81
82
83
84
85
86
87
88
89
90
91
92
93
94
95
96
97
98
99
100
101
102
103
104
105
106
107
108
109
110
111
112
113
114
115
116
117
118
119
120
121
122
123
124
125
126
127
128
129
130
131
132
133
134
135
136
137
138
139
140
141
142
143
144
145
146
147
148
149
150
151
152
153
154
155
156
157
158
159
160
161
162
163
164
165
166
167
168
169
170
171
172
173
174
175
176
177
178
179
180
181
182
183
184
185
186
187
188
189
190
191
192
193
194
195
196
197
198
199
200
201
202
203
204
.rightcontainer {
    float: left;
    height: 830px;
    width: 310px;
    padding-left: 20px;
}
.authorinfo_container {
    float: left;
    height: 120px;
    width: 305px;
    background-image: url(images/dots_spacer.png);
    background-repeat: no-repeat;
    background-position: bottom;
}
#authorimage {
    float: left;
    height: 75px;
    width: 75px;
    border: 1px solid #c0c0c0;
    background-color: #FFF;
    padding: 5px;
}
#authorinformation {
    height: 55px;
    width: 175px;
    float: left;
    margin-left: 20px;
    font-family: Verdana;
    font-size: 12px;
    color: #1da3ff;
}
#authorinformation h1 {
    font-family: "Francois One";
    color: #222333;
    font-size: 24px;
    margin: 0px;
}
#socialnetworkcontainer {
    float: left;
    height: 25px;
    width: 115px;
    margin-left: 40px;
    margin-top: 15px;
}
#facebook {
    background-image: url(images/socialmedia_sprite.png);
    background-repeat: no-repeat;
    background-position: left;
    float: left;
    height: 20px;
    width: 20px;
    margin-right: 5px;
}
#gowalla {
    background-image: url(images/socialmedia_sprite.png);
    background-repeat: no-repeat;
    background-position: -20px;
    float: left;
    height: 20px;
    width: 20px;
    margin-right: 5px;
    margin-left: 5px;
    }
#twitter {
    background-image: url(images/socialmedia_sprite.png);
    background-repeat: no-repeat;
    background-position: -41px;
    float: left;
    height: 20px;
    width: 20px;
    margin-right: 5px;
    margin-left: 5px;
    }
#wordpress {
    background-image: url(images/socialmedia_sprite.png);
    background-repeat: no-repeat;
    background-position: right;
    float: left;
    height: 20px;
    width: 20px;
    margin-right: 5px;
    margin-left: 5px;
    }
.pages {
    float: left;
    height: 30px;
    width: 305px;
    background-image: url(images/dots_spacer.png);
    background-repeat: no-repeat;
    background-position: bottom;
    font-family: "Francois One";
    font-size: 18px;
    color: #b5b5b5;
    text-align: center;
    padding-top: 5px;
}
.pages a {
    color: #b5b5b5;
}
.pages a:hover {
    color: #DE5400;
}
.search_container {
    height: 70px;
    width: 295px;
    float: left;
    margin-left: 10px;
    margin-top: 25px;
    background-image: url(images/dots_spacer.png);
    background-position: bottom;
    background-repeat: no-repeat;
}
#search {
    float: left;
    height: 45px;
    width: 225px;
    background-color: #afafaf;
    border-top-style: none;
    border-right-style: none;
    border-bottom-style: none;
    border-left-style: none;
    font-family: Verdana;
    font-size: 14px;
    color: #FFF;
    padding-left: 15px;
}
#button {
    background-image: url(images/search_button.png);
    background-repeat: no-repeat;
    float: left;
    height: 47px;
    width: 45px;
    text-indent: -999in;
    border-top-style: none;
    border-right-style: none;
    border-bottom-style: none;
    border-left-style: none;
    background-color: #AFAFAF;
}
.twitter_container {
    float: left;
    height: 330px;
    width: 305px;
    background-image: url(images/dots_spacer.png);
    background-repeat: no-repeat;
    background-position: bottom;
    margin-top: 20px;
}
#twitterheader {
    background-image: url(images/twitterbird_icon.png);
    background-repeat: no-repeat;
    background-position: left;
    width: 245px;
    height: 45px;
    float: left;
    padding-left: 60px;
    font-family: "Francois One";
    color: #1da3ff;
    font-size: 22px;
    padding-top: 10px;
    margin-bottom: 15px;
}
#tweet {
    float: left;
    height: auto;
    width: 295px;
    background-image: url(images/dots_spacer.png);
    background-repeat: no-repeat;
    background-position: bottom;
    padding-bottom: 20px;
    font-family: Verdana;
    font-size: 12px;
    color: #000;
    margin-left: 5px;
    margin-bottom: 15px;
}
.followingcontainer {
    float: left;
    height: 155px;
    width: 305px;
    background-image: url(images/dots_spacer.png);
    background-repeat: no-repeat;
    background-position: bottom;
    margin-top: 20px;
    }
.followingcontainer h1 {
    font-family: "Francois One";
    color: #222333;
    font-size: 24px;
    margin-top: 0px;
    margin-right: 0px;
    margin-bottom: 10px;
    margin-left: 0px;
    }
.followimage {
    float: left;
    height: 32px;
    width: 32px;
    background-color: #232434;
    border: 3px solid #FFF;
    margin-top: 5px;
    margin-right: 5px;
    margin-bottom: 5px;
}

Great! Let’s go ahead now and start on our CSS for the Author Information area. We need to open up our right container DIV and then place our Author Information stuff in there. Here is our html:

1
2
3
4
5
6
7
8
9
10
11
12
13
14
<div class="rightcontainer">
  <div class="authorinfo_container">
    <div id="authorimage"><img src="images/ai_holder.png" width="76" height="76" /></div>
    <div id="authorinformation">
      <h1>Aaron Nichols</h1>
      <p>Web and Graphic Designer</p>
    </div>
    <div id="socialnetworkcontainer">
      <div id="facebook"></div>
      <div id="gowalla"></div>
      <div id="twitter"></div>
      <div id="wordpress"></div>
    </div>
  </div>

Now, we have used divs for our social networking right now because the code will change substantially as we move forward into coding this to Tumblr. If you are wanting to keep this as an HTML version template all you have to do is replace

withYou may need to change up a few things in the CSS and, of course, you will need to put in the right link and id for whatever social network you are using.

Ok, let;s move onto our pages and search area. In our HTML version this will again be very basic because as we move to Tumblr we will go into more detail and will need to change stuff up, but we can’t do anything until our HTML is stable.

Place this directly after our previous html:

1
2
3
4
5
6
7
<div class="pages"><a href="#">My Website</a> </div>
   <div class="pages"><a href="#">About Me</a> </div>
   <div class="search_container">
     <label for="search"></label>
     <input type="text" name="search" id="search" />
     <input type="submit" name="button" id="button" value="Submit" />
   </div>

Now, let’s move forward onto our twitter area. In our HTML version this will consist, mostly, of filler content until we move forward into coding for Tumblr so I will provide you with the basic HTML.

1
2
3
4
5
6
7
8
9
<div class="twitter_container">
      <div id="twitterheader">Keep Updated With Twitter</div>
      <div id="tweet">Posted a new snap to dribbble with a preview of next weeks freebie, check it out and be sure to check the full size -- http://drbl.in/biSW
    </div>
    <div id="tweet">Posted a new snap to dribbble with a preview of next weeks freebie, check it out and be sure to check the full size -- http://drbl.in/biSW
    </div>
    <div id="tweet">Posted a new snap to dribbble with a preview of next weeks freebie, check it out and be sure to check the full size -- http://drbl.in/biSW
    </div>
    </div>

And, finally, to finish off our tutorial we will be adding our following area. When you see this bit of code you will probably freak out because it’s ugly but don’t worry about it right now. We have to make this code look super ugly right now to get our html stable.

1
2
3
4
5
6
7
8
9
10
11
12
13
14
15
16
17
18
19
20
21
<div class="followingcontainer">
      <h1>I'm Following These Guys</h1>
      <div class="followimage"></div>
      <div class="followimage"></div>
      <div class="followimage"></div>
      <div class="followimage"></div>
      <div class="followimage"></div>
      <div class="followimage"></div>
      <div class="followimage"></div>
      <div class="followimage"></div>
      <div class="followimage"></div>
      <div class="followimage"></div>
      <div class="followimage"></div>
      <div class="followimage"></div>
      <div class="followimage"></div>
      <div class="followimage"></div>
      </div>
  </div>
</div>
</body>
</html>

CONCLUSION

That finishes off the tutorial! I know that it was a long time coming and there was a lot to it, but just wait until we move forward onto coding this to a tumblr theme. You will see a huge messy bunch of code (this tutorial) become an amazing bunch of code transformed into a theme.

Let us know what you thought in the comments or on Facebook.

Your ads will be inserted here by

AdSense Now!.

Please go to the plugin admin page to paste your ad code.

Forrst API Tutorial — Pt II

Your ads will be inserted here by

AdSense Now!.

Please go to the plugin admin page to paste your ad code.

This is a follow up tutorial to the Forrst User API Tutorial – Pt. 1 and will teach you how to grab the posts for a forrst user.
As of April 2011 this still works, but may change as their API is still being developed and in this case we are scraping the user’s profile page to generate some useful arrays that we then place into a custom template.
We will use the API V2, which returns the data in JSON format, which we then use json_decode on. In case the API fails or your server does not have json support setup for PHP, we have a backup Simple HTML DOM script by S.C. Chen to convert the user’s Posts page into a data object from which we then grab the individual posts. This DOM script only grabs public posts as it gets only displayed posts on the public profile.

You can use this to generate your own custom profile pages with Forrst data, and it’s easy to combine with the previous user data tutorial.

Instead of using file_get_contents we use Curl to grab the data in this one and that can easily be transplanted into the previous tutorial as well.


DEMO PAGE

Clicking the above image will take you to a demo using the code explained below.

Resources

Active Usernames from Forrst by forsst.com

Simple HTML Dom Script by S.C. Chen

How to Grab Forrst User Posts

At this time the Forrst API does not have a search call for filtering posts, so this script will let you grab the posts for a specific user via their username to display as you see fit.

For the demo I started it with my own, but you can type in any other valid username and see their info as well.

In order to grab the posts data we are using the API V2 which returns the data in JSON format. In case of failuer we fall back to the Simple HTML Dom script which turns the html into an object set. The DOM script is not as complete as the API script but provides enough information for a basic content display.

Issues with the DOM version:
– Actual full post URLs are not links we can grab from the posts list, so we cannot reach those pages without knowing the URLs by manually grabbing them.
– It grabs less fields of data since we are stripping the posts page, so it’s limited opposed to the API V2 version.
– Does not return half the fields the API does. They are explained in the PHP code below.

1
2
3
4
5
6
7
8
9
10
11
12
13
14
15
16
17
18
19
20
21
22
23
24
25
26
27
28
29
30
31
32
33
34
35
36
37
38
39
40
41
42
43
44
45
46
47
48
49
50
51
52
53
54
55
56
57
58
59
60
61
62
63
64
65
66
67
68
69
70
71
72
73
74
function get_forrst_posts($username){
    //USE JSON DECODE (Note: Your server must have the json module installed for PHP, or another class emulating it for this to work.
    //Note: I did not use a Class for this as I wanted to embed the DOM solution too and found this was not something you would do in a Class definition.
    $curl = curl_init('http://api.forrst.com/api/v2/users/posts?username='.$username);
    curl_setopt($curl, CURLOPT_RETURNTRANSFER, true);
    $response = curl_exec($curl);
    $response = @json_decode($response); //Disable error display with "@" so the DOM method is attempted if JSON fails.
    curl_close($curl);
    if($response->stat!='ok'){
        $usedom=1; // If JSON does not return "ok" (This means, the API failed, or the API call returned fail, or json_decode does not work on this server. So we try the DOM method anyway.
    }else{
        foreach($response->resp as $post){
            //Note: do a print_r on $response to see all the variables. It does also return all the user info, but I find that should not be in the "Posts" call as it's already in the "User" call.
            //To get time ago, take created_at value, break it into pieces, use mktime to generate a unix timestamp from it, pass that to the time_ago function.
            $t1 = explode(' ',trim($post->created_at));
            $d1 = explode('-',$t1[0]);
            $t2 = explode(':',$t1[1]);
            $timestamp=mktime($t2[0],$t2[1],$t2[2],$d1[1],$d1[2],$d1[0]);
            $p['posted'] = time_ago($timestamp);
            $p['title'] = $post->title;
            $p['subtitle'] = ($post->url?'<a href="'.$post->url.'">'.$post->url.'</a>':'');
            $p['description'] = $post->description;
            $p['content'] = $post->content; // Code and Questions have the content section that essentially gets added into the full article on display.
            $p['likes'] = $post->like_count;
            $p['comments'] = $post->comment_count;
            //The following fields only come from the API and are not available for the DOM solution.
            $p['created'] = $post->created_at; //instead of days since post (like the DOM request, this returns the time of the post.
            $p['post_url'] = $post->post_url; // URL to detailed post view on forrst. Not available in DOM result.
            $p['type'] = $post->post_type; //Determines what var is the article description.
            $p['published'] = $post->published; //Status var showing if the post is currently published or not. The DOM only sees published posts.
            $p['public'] = $post->public; //Status var showing if the post is public or not. The DOM only sees public posts.
            $p['post_url'] = $post->post_url; //Used for the subtitle.
            $p['formatted_description'] = $post->formatted_description; //HTML version of the description
            $p['formatted_content'] = $post->formatted_content; //HTML version of the description
            $ret[] = $p;
        }
        if(count($ret)==0){
            return $ret = array('error'=>'No Posts Found');
        }else return $ret;
    }
    if($usedom){
        // USING THE SIMPLE HTML DOM SCRIPT
        // As you can see above this does not return nearly as much information as the API and should not be used if you have json enabled.
        include_once('simple_html_dom.php');
        $html = file_get_html("http://forrst.me/".$username."/posts"); //Generate the HTML DOM object.
        // THIS IS COMPLETELY BASED ON THE CURRENT HTML MARKUP FOR THE POSTS PAGE.
        // IF THE FORRST MARKUP CHANGES, THIS MUST BE UPDATED TOO.
        if(count($html->find('div.Post')>0)){
            foreach($html->find('div.Post') as $post) {
                $p['posted'] = trim($post->find('div.activity-meta', 0)->plaintext);
                $p['title'] = trim($post->find('.title', 0)->plaintext);
                $p['subtitle'] = trim($post->find('.subtitle', 0)->plaintext);
                $p['description'] = trim($post->find('.description', 0)->plaintext);
                $p['likes'] = trim($post->find('.likes', 0)->plaintext);
                $p['comments'] = trim($post->find('.comments', 0)->plaintext);
                $ret[] = $p;
            }
        }else $ret='';
        $html->clear(); // Clears memory.
        unset($html);
        if(count($ret)==0){
            return $ret = array('error'=>'No Posts Found');
        }else return $ret;
    }
}

The function is written to generate a simple array of data. In the demo we only use the fields shared by the API call and the DOM script, but using the API you can generate some additional display data.
By looping through the array you can then generate a display with the data.


The Data Returned:

Your ads will be inserted here by

AdSense Now!.

Please go to the plugin admin page to paste your ad code.

When the html data is converted into an array, the fields used for our basic display contain the following information:

  • $p[‘posted’] : How long ago the Post was posted
  • $p[‘title’] : The Username.
  • $p[‘subtitle’] : The Name.
  • $p[‘description’] : The Profile URL for the User.
  • $p[‘likes’] : The number of Likes for the post.
  • $p[‘comments’] : The number of comments for the post.

Post Display Manipulation

To display the data in the demo I used some basic html to just output the data to the screen, basic usage of some of the returned user data.
The great thing is that once you have the data array, you can essentially do anything you want with it.
Below follows a display example of the results.

<div id="wrapper">
<div id="result" class="with_bg">
		<span class="posted">posted 4 weeks ago</span>
<h1 class="sh">Freelancer Demotivational Posters</h1>
		<span class="subtitle">http://freelanceswitch.com/humour/de-motivational-posters-for-freelancers/</span>

		Enjoy these posters, a pretty funny find this morning.</div>
</div>
html, body{ width:100%; height:100%; padding:0; margin:0; font-size:12px; font-family: arial, helvetica; background:#162810;}
#wrapper{width:840px; margin:0 auto; padding:20px; background:#EBE9DB; }
.with_bg{ padding:10px; background:#F7F7F7;}
form {width:400px; margin:0 auto; }
h1{ color:#3B3227; }
#result{ width:660px; margin:20px auto; }
.posted{float:right; font-size:11px; color:#999;}
.sh{width:400px;}
.subtitle{color:#333; }

Conclusion

This script will help you grab some Forrst data and create a quick basic profile page with basic post info.

As the API develops we may eventually write a formal API class, though I’m certain the Forrst staff are already working on that.
At this time, I’m hoping this tutorial helps you get started with your Forrst apps/pages.

The full PHP/HTML/CSS source is available here: http://webnuz.com/tutorials/04-03-2011_Forrst_API_Grab_User_Posts/source.txt

You will also need the Simple HTML Dom script, which you can grab here: http://webnuz.com/tutorials/04-03-2011_Forrst_API_Grab_User_Posts/simple_html_dom.txt

launch_demo


Your ads will be inserted here by

AdSense Now!.

Please go to the plugin admin page to paste your ad code.

Forrst API Pull Tutorial — Pt. 1

Your ads will be inserted here by

AdSense Now!.

Please go to the plugin admin page to paste your ad code.

Forrst.com has become a community of over 23000 Developers and Designers in only a few months, and this tutorial will teach you how to use a simple Forrst API call to grab the public data for a forrst user.
As of March 2011 this still works, but may change as their API is still being developed. We will use a simple PHP get file contents call to grab the JSON data, and then convert that into a useful PHP array, which in turn will be used to generate a simple html display.

Getting Started

You can use this to generate your own pages with your Forrst data or perhaps a useful application for Forrst users.
There will be a lot more to come in the full API release, but you’ll have to ask Kyle Bragger about that.

find_a_forrst_user

Clicking the above image will take you to a demo using the code explained below.

Resources

Active Usernames from Forrst by forsst.com

file_get_contents in PHP by PHP.net

json_decode in PHP by PHP.net

How to get Forrst user data

Your ads will be inserted here by

AdSense Now!.

Please go to the plugin admin page to paste your ad code.

At this time the Forrst API does not have a search functionality, so this will only work with exact username matches.
For the demo I started it with my own, but you can type in any other valid username and see their info as well.

In order to grab the json data we are using a simple PHP function:

1
2
3
4
5
6
7
8
9
10
11
12
13
14
15
16
17
function forrst_user($username){
    $userdata = file_get_contents("http://api.forrst.com/api/v2/users/info?username=".$username);
    // We use json_decode to put the data into an array.
    //Note: json_decode only work in PHP5+ and the module must be installed in apache on your server.
    $data = json_decode($userdata, true);
    $user = $data['resp'];
    if($data['stat']=='ok') return $user;
    else{
        if($data['stat']=='fail'){
            return array('error'=>$data['error']);
        }else{
            //There could be additional statuses returned in the future
        }
    }
}

This function uses two built-in php functions “get_file_contents” and “json_decode” to do the hard work for you. The first one grabs the data via the API URL provided by Forrst.
The second converts the returned data into useful PHP arrays. Note: json_decode only work in PHP5.2+ and the module must be installed in apache on your server.

The Data Returned:

The API call returns a block of data, which when converted into arrays contains the following information:

  • $user[‘id’] : The Forrst ID #
  • $user[‘username’] : The Username.
  • $user[‘name’] : The Name.
  • $user[‘url’] : The Profile URL for the User.
  • $user[‘posts’] : The # of Posts Created by the User on Forrst.
  • $user[‘comments’] : The # of Comments made by the User on Forrst Posts.
  • $user[‘likes’] : The # of Likes made by the User on Forrst Posts.
  • $user[‘followers’] : The # of people following this User.
  • $user[‘following’] : The # of people followed by this User.
  • $user[‘photos’] : Array of all the images stored for this user on Forrst.
    • [xl_url] (200px by 200px)
    • [large_url] (150px by 150px)
    • [medium_url] (75px by 75px)
    • [small_url] (45px by 45px)
    • [thumb_url] (25px by 25px)
  • $user[‘in_directory’] : 1 meaning the user is in the forrst directory and 0 if they are not.
  • $user[‘tag_string’] : comma delimited string of tags the user finds themselves interested in.

At the time of this writing there are additional fields being returned that may later on be used for proper authentication as there is currently no authentication to pull this data.

These fields are:

  • $data[‘stat’] : Returns the status of the response. “ok” if the request succeeded. “fail” in case of an error.
  • $data[‘in’] : Returns the time it took to execute the request in seconds.
  • $data[‘authed’] : Currently returns empty or “false”. This field tells us if the request was authorized.
  • $data[‘authed_as’] : Currently returns empty or “false”. This field will most likely tell us in the future which API user made the request.
  • $data[‘env’] : Currently just returns “prod” (As in Production Environment) This fields is probably more useful to the Forrst Devs than to us.
  • In case of failure: $data[‘error’] : Contains the textual Error Message returned by the API

Data/Display Manipulation

To display the data in the demo I used some basic html to just output the data to the screen, including basic usage of all the returned user data.
The great thing is that once you have the data array, you can essentially do anything you want with it.
Below follows a display example of the results.

1
2
3
4
5
6
7
8
9
10
11
12
13
14
15
16
17
18
19
20
21
22
23
24
25
26
27
28
29
30
31
32
33
34
35
36
37
38
39
40
41
42
43
44
45
46
47
48
49
50
51
52
53
54
55
56
57
58
59
60
61
62
63
</pre>
<pre><body>
<div id="wrapper">
 <form action="" method="post">
 <h1>Find Posts for a Forrst User:</h1><br />
 Enter Username: <input type="text" name="username" size="25" value="'.strip_tags(trim($_POST['username'])).'"/> <input type="submit" name="irrelevant" value="Go!" />
 </form>
';
if(!$_POST['username']){
 $u = get_forrst_posts('crassiusneo');
 $_POST['username']='crassiusneo';
 echo '
 <div id="result">
 Hi, This script will grab the public posts for a Forrst User.<br /><br />
 It does not use the API as that functionality is not yet available to us.<br /><br />
 You can generate a neat custom profile if you combine this script with the previous tutorial at:<br />
 <a href="http://www.webnuz.com/tutorials/03-27-2011_Forrst_API_Tutorial">http://www.webnuz.com/tutorials/03-27-2011_Forrst_API_Tutorial</a>
 <br /><br />
 Below are the Posts grabbed from my own Posts page, but type in a Username above and you can grab theirs too.<br />
 A View Link is not yet possible because Forrst uses a controller to generate a unique link for each post, so that will have to wait for the official Forrst API release.
 </div>';
}else{
 $u = get_forrst_posts($_POST['username']);
}
if(isset($u['error']) || $u==''){
 if($u=='') $u['error']='Not Found.';
 echo '<p>Your request for data about username: <strong>'.$_POST['username'].'</strong> failed. Reason: <strong>'.$u['error'].'</strong></p>';
}else{
 if(count($u)>0){
 echo '<div id="result">
 <h1><strong>Posts for '.$_POST['username'].'</strong>.</h1>
 </div>';
 foreach ($u as $p){
 echo '
 <div id="result">
 <p>
 <span>'.$p['posted'].'</span>
 <h1>'.$p['title'].'</h1>
 <div></div>
 <span>'.$p['subtitle'].'</span><br />
 '.$p['description'].'
 </p>
 </div>';
 }
 echo '
 <div id="result">
 <p>
 You can check out the Forrst profile at:<br /> <a href="http://forrst.me/'.$_POST['username'].'" target="_blank">http://forrst.me/'.$_POST['username'].'</a>.<br />
 You can check view the Forrst Posts page at:<br /> <a href="http://forrst.me/'.$_POST['username'].'/posts" target="_blank">http://forrst.me/'.$_POST['username'].'/posts</a>.<br />
 </p>
 </div>';
 }
}
echo '
 <div>
 <a href="http://www.webnuz.com/tutorials/04-03-2011_Forrst_API_Grab_User_Posts/source.txt" target="_new">Click here to View the source</a><br />
 </div>
</body></pre>
<p>

Some CSS

1
2
3
4
5
6
html, body{ width:100%; height:100%; padding:0; margin:0; font-size:12px; font-family: arial, helvetica; background:#162810;}
#wrapper{width:800px; margin:0 auto; padding:20px; background:#EBE9DB; }
.with_bg{ padding:10px; background:#F7F7F7;}
form {width:400px; margin:0 auto; }
h1{ color:#3B3227; }
#result{ width:400px; margin:20px auto; }

Conclusion

The Forrst API is still in its infancy and at this time you can only do some basic requests, but we know they are working on releasing a full version soon that should have a lot more functionality.
For now, I hope this tutorial just gave you an idea of what sort of data you will be able to expect from the Forrst API, and also showed you how you can use a little bit of code to process and display the data returned by the API.

The full PHP/HTML/CSS source is available here: Here


Your ads will be inserted here by

AdSense Now!.

Please go to the plugin admin page to paste your ad code.

CSS3 Buttons Tutorial

Your ads will be inserted here by

AdSense Now!.

Please go to the plugin admin page to paste your ad code.

With the implementation of CSS3 in most modern browsers, using it in place of images for buttons is now an option. CSS3 buttons have the advantage of being easier for screen readers to process, as well as being lighter on your page load times. Also, editing them doesn’t require you go into Photoshop, instead you can just edit your source code! In this tutorial I’ll show you how to use CSS to style links to look like buttons, with minimal hassle.

The HTML

First off, we just add a class of Button to the link we want to turn into a button.

 <a class="button" href="”#”">BUY NOW</a>

Basic text styling

Now add some basic styling, using text-decoration, color, font-size and font-family.

 .button { text-decoration: none; color: white; font-size: 18px; font-family: arial, sans serif; }

Giving the button structure

Next we’re going to make the button look like a solid shape. We’ll do this by giving it a background-color, a border and some padding.

 padding: 11px 35px 11px 35px; border: 1px solid rgb(120,120,120); background: rgb(82,178,214);

Adding the CSS3

Now we get to the CSS3! First off we’ll start with text-shadow.

 text-shadow: 0px 1px 0px rgb(67,137,167);

This will give the text a one pixel shadow underneath it. Text-shadow is supported in later versions of Firefox, Google Chrome, Safari, Opera and IE9.

Next let’s add some rounded corners to the button using border-radius.

Your ads will be inserted here by

AdSense Now!.

Please go to the plugin admin page to paste your ad code.

 Border-radius: 3px;

To make border-radius work in Firefox, we’ll need to use a browser prefix. This just means we use the same code, but with -moz- attached to the start (short for Mozilla).

 -moz-border-radius: 3px; Border-radius: 3px;

Finally add a background gradient. Gradients can actually be made to work in most browsers.

 /*For browers that don't support gradients*/ background: rgb(82,178,214);

For browsers that do support gradient:

 /*For Google Chrome and Safari*/ background: -webkit-gradient(linear, left top, left bottom, from(#72C0DE), to(#42ABD2));  /*For Firefox*/ background: -moz-linear-gradient(top, #72C0DE, #42ABD2);

Adding the Hover Effects

We will be adding some simple hover effects so people can tell when their cursor is actually over the button :)

 .button:hover {  border: 1px solid rgb(130,130,130);  /*For browers that don't support gradients*/ background: rgb(105,188,220);  /*For Google Chrome and Safari*/ background: -webkit-gradient(linear, left top, left bottom, from(#82C7E1), to(#5AB6D8));  /*For Firefox*/ background: -moz-linear-gradient(top, #82C7E1, #5AB6D8); }  .button:active { background: rgb(54,165,207);  /*For Google Chrome and Safari*/ background: -webkit-gradient(linear, left top, left bottom, from(#5AB6D8), to(#82C7E1));  /*For Firefox*/ background: -moz-linear-gradient(top, #5AB6D8, #82C7E1); }

Live Demo

You can view the live demo here. Will work best in a web-kit browser but should render decently in a non-webkit browser :)

Conclusion

I hope you enjoyed this tutorial by John Tidey, a new author to HV-Designs. You will be seeing more implementation of CSS3 and HTML5 tutorials on the site, so let’s see your response to this tutorial! Post your work on the tutorial in a comment and show some love to our new author.


Your ads will be inserted here by

AdSense Now!.

Please go to the plugin admin page to paste your ad code.

Coming Soon Page :: PSD to HTML

Your ads will be inserted here by

AdSense Now!.

Please go to the plugin admin page to paste your ad code.

Good evening everybody, today I’ll be walking you through the process of coding your “Coming Soon Page” into a working HTML/CSS Template. Lets get started.

The Live Version

You can check out the Live Version of the template by clicking here. The template has been tested in the following browsers without any problems.

  • Firefox 2.0, 3.0 and 3.5
  • Internet Explorer 7 and 8
  • Chrome 3.0
  • Safari 3.0 and 4.0

Preparing Your Files

You will need to create a new folder on your desktop titled “Coming Soon”. Please create the following files: index.html, style.css, countdown.js,  a folder titled signup,  and a folder titled images. It should be set up like below:

Slicing Our Photoshop Document

Start out by slicing your background image like so and saving it as background.PNG. The selection doesn’t have to be exactly the same but you may need to play with it a bit to avoid a white line around the edge.

Now we will slice our header like the following image, hide the background,  and save it as header.PNG:

Time to slice our time line, like the following, and save it as timeline.PNG. We will be including our text in the time line image to save time and future coding. Rather than having to update the CSS to get the font to fit each time we will simply change the image.

Slice your wooden cup like the following image, hide your background layer, and save it is wooden_cup.PNG:

Now to slice the background for our email sign up input layer. You will not need to hide the background on this image as we will not be including any background. If you do get a background, however, you can always fix it in the CSS later on where any problems crop up. Save it as input_bg.PNG.

And to save our submit button. Again you will not need to hide the background layer because you will be getting rid of all the background. Save it as input_submit.PNG:

Setting Up Our CSS

Setting up our CSS will require very little. All the measurements come from our images and our photoshop document. The one area that I want to draw your attention to is that we will be using @font face in this document. We will only be using our Qlassik Medium font in one area, to minimize the effect on people viewing without compatible browsers.  I like to use the Coming Soon page to see how many of our visitors are effected by browser compatibility (such as CSS3).

Your ads will be inserted here by

AdSense Now!.

Please go to the plugin admin page to paste your ad code.

Here is our CSS for the @fontface.

1
2
3
4
@font-face {
 font-family: Qlassik Medium;
 src: url(http://www.yourwebsite.com/webfonts/qlassik_medium.otf);
}

You will obviously want to change the source url to whatever URL you have your font located at.  Again the rest of our CSS is simple, drawn from measurements in Photoshop.

1
2
3
4
5
6
7
8
9
10
11
12
13
14
15
16
17
18
19
20
21
22
23
24
25
26
27
28
29
30
31
32
33
34
35
36
37
38
39
40
41
42
43
44
45
46
47
48
49
50
51
52
53
54
55
56
57
58
59
60
61
62
63
64
65
66
67
68
69
70
71
72
73
74
75
76
77
78
79
80
81
82
83
84
85
86
87
88
89
90
91
92
93
94
95
96
97
98
99
100
101
102
103
104
105
106
107
108
109
110
111
112
113
114
115
116
117
118
119
120
body {
 background-image: url(images/background.png);
 background-repeat: repeat;
 background-color: #000;
 font-family: "Qlassik Medium";
}
.container{
 height: 618px;
 width: 1100px;
 margin-right: auto;
 margin-left: auto;
}
.header {
 margin-top: 40px;
 margin-left: 125px;
 background-image: url(images/header.PNG);
 background-repeat: no-repeat;
 float: left;
 height: 118px;
 width: 850px;
 text-indent: -999in;
}
.timeline {
 background-image: url(images/timeline.PNG);
 background-repeat: no-repeat;
 float: left;
 height: 74px;
 width: 940px;
 margin-top: 100px;
 margin-left: 80px;
 text-indent: -999in;
}
.countdown {
 float: left;
 height: 55px;
 width: 560px;
 font-family: "Qlassik Medium";
 font-size: 36px;
 color: #FFF;
 margin-top: 25px;
 margin-left: 285px;
}
.information_overall {
 float: left;
 height: 100px;
 width: 450px;
 margin-top: 70px;
 margin-left: 35px;
}
#information_woodencup {
 background-image: url(images/wooden_cup.PNG);
 background-repeat: no-repeat;
 float: left;
 height: 92px;
 width: 50px;
 margin-right: 10px;
}
#information_text {
 float: left;
 height: 75px;
 width: 390px;
 color: #FFF;
 font-family: Verdana, Geneva, sans-serif;
 font-size: 14px;
 margin-top: 20px;
}
#resume-link {
 font-weight: bold;
 color: #F00;
 text-decoration: none;
}
#deviantart-link{
 color: #0F0;
 font-weight: bold;
 text-decoration: none;
}
#flickr-link {
 color: #C09;
 font-weight: bold;
 text-decoration: none;
}
#facebook-link {
 font-weight: bold;
 color: #06F;
 text-decoration: none;
}
.mailsignup {
 float: right;
 height: 80px;
 width: 480px;
 margin-top: 90px;
 color: #FFF;
}
.input {
 background-image: url(images/input_bg.PNG);
 background-repeat: repeat;
 height: 57px;
 width: 362px;
 border-top-style: none;
 border-right-style: none;
 border-bottom-style: none;
 border-left-style: none;
 float: left;
 font-family: "Arial Black", Gadget, sans-serif;
 font-size: 24px;
 color: #FFF;
 padding-left: 20px;
}
.submit {
 background-image: url(images/input_submit.PNG);
 background-repeat: no-repeat;
 height: 50px;
 width: 93px;
 float: left;
 border-top-style: none;
 border-right-style: none;
 border-bottom-style: none;
 border-left-style: none;
 text-indent: -999in;
}

I would like to draw your attention to a few areas of the CSS that have relevance though. We will, again, be using our text-indent: -999in to add text to an area that we don’t need to show text. It will help the Search Engines in seeing the content without having to rely too much on areas that can be too greatly effected by CBC (Cross Browser Compatibility). Also, however, it will remove the text from your submit field so you have only the image but that the form still knows what you are saying.

I would also like to draw your attention to the

1
2
3
4
5
6
7
8
9
10
11
12
13
14
15
16
17
18
19
20
21
22
23
24
25
26
27
.input {
 background-image: url(images/input_bg.PNG);
 background-repeat: repeat;
 height: 57px;
 width: 362px;
 border-top-style: none;
 border-right-style: none;
 border-bottom-style: none;
 border-left-style: none;
 float: left;
 font-family: "Arial Black", Gadget, sans-serif;
 font-size: 24px;
 color: #FFF;
 padding-left: 20px;
 }
 .submit {
 background-image: url(images/input_submit.PNG);
 background-repeat: no-repeat;
 height: 50px;
 width: 93px;
 float: left;
 border-top-style: none;
 border-right-style: none;
 border-bottom-style: none;
 border-left-style: none;
 text-indent: -999in;
 }

Notice the borders being set to none. It may seem like a waste of CSS to have the border styles be placed in CSS when they are just going to be set to none, but by default the input field and submit fields are set to have a border. You must place the border style none in your CSS to avoid this issue.

You can download the full CSS files from here.

Setting Up Our index.html Files

The HTML in our document is very simple. The only areas that are complicated are adding the javascript required to get the countdown to work as well as the forms to get our email sign up form working. To start out I will detail out the header of our HTML, all the way through including the style.css file but stopping at the javascript required to get the countdown working.

1
2
3
4
5
6
7
8
9
10
11
12
13
14
15
16
17
18
19
20
21
22
23
24
25
26
27
28
29
<!DOCTYPE html PUBLIC "-//W3C//DTD XHTML 1.0 Transitional//EN" "http://www.w3.org/TR/xhtml1/DTD/xhtml1-transitional.dtd">
<html xmlns="http://www.w3.org/1999/xhtml">
<head>
<meta http-equiv="Content-Type" content="text/html; charset=utf-8" />
<title>Freelance Is My Life.....Well Not Yet But It Will Be</title>
<link href="style.css" rel="stylesheet" type="text/css" />
<SCRIPT LANGUAGE="JavaScript" SRC="countdown.js"></script>
</head>
<body>
<div>
 <div>Freelance is my life is coming soon.</div>
 <div>We have finished our Photoshop Document and are working on Coding our Home Page!</div>
 <div><div id="countbox"></div></div>
 <div>
 <div id="information_woodencup"></div>
 <div id="information_text">My website will be up shortly. In the meantime please feel free to take a look at my <a href="http://custompowerdesigns.com/freelance-cv/" id="resume-link">online resume</a>. You can also check out some of our work on <a href="http://custompowerdesigns.deviantart.com" id="deviantart-link">deviantART</a>, <a href="http://www.flickr.com/photos/custompowerdesigns/" id="flickr-link">flickr</a>, or my <a href="http://www.facebook.com/pages/Pueblo-CO/Custom-Power-Designs/381376000380" id="facebook-link">facebook</a> page</div>
 </div>
 <div>  <form action="signup/MailForm.php" method="POST">
<input type="hidden" name="recipient" value="[email protected]">
<input type="hidden" name="subject" value="Contact From CPD Web">
<input type="hidden" name="redirect" value="thankyou.htm">
<input type="hidden" name="required" value="email">
<input type="hidden" name="errorpage" value="signup/error.htm">
<input name="email" type="text" id="email" value="Your Email Address" size="30"><INPUT name="submit" type="submit">
</form>
</div>
</div>
</body>
</html>

Our form is a very basic form used to call our PHP document that will run everything. It also has our error sheet and thank you document. You  can also add an autoresponder to the document as well by using the same input type and declaring your document.

Please download our MailForm.PHP file for use in this document. We are not going to cover how to specifically create a form mailer in this tutorial.

Setting Up Our Countdown JavaScript File

Our countdown file is a very simple javascript code. It uses the very basics of javascript math and basic JavaScript funtions.

1
2
3
4
5
6
7
8
9
10
11
12
13
14
15
16
17
18
19
20
21
22
23
24
25
26
27
28
29
30
31
32
33
34
35
36
37
38
39
40
41
42
43
44
45
46
47
48
49
50
51
52
53
// JavaScript Document
//######################################################################################
// NOTE: the month entered must be one less than current month. ie; 0=January, 11=December
// NOTE: the hour is in 24 hour format. 0=12am, 15=3pm etc
// format: dateFuture = new Date(year,month-1,day,hour,min,sec)
// example: dateFuture = new Date(2003,03,26,14,15,00) = April 26, 2003 - 2:15:00 pm
dateFuture = new Date(2011,4,19,22,33,39);
// TESTING: comment out the line below to print out the "dateFuture" for testing purposes
//document.write(dateFuture +"<br />");
//
//nothing beyond this point
function GetCount(){
 dateNow = new Date();                                    //grab current date
 amount = dateFuture.getTime() - dateNow.getTime();        //calc milliseconds between dates
 delete dateNow;
 // time is already past
 if(amount < 0){
 document.getElementById('countbox').innerHTML="Now!";
 }
 // date is still good
 else{
 days=0;hours=0;mins=0;secs=0;out="";
 amount = Math.floor(amount/1000);//kill the "milliseconds" so just secs
 days=Math.floor(amount/86400);//days
 amount=amount%86400;
 hours=Math.floor(amount/3600);//hours
 amount=amount%3600;
 mins=Math.floor(amount/60);//minutes
 amount=amount%60;
 secs=Math.floor(amount);//seconds
 if(days != 0){out += days +" day"+((days!=1)?"s":"")+", ";}
 if(days != 0 || hours != 0){out += hours +" hour"+((hours!=1)?"s":"")+", ";}
 if(days != 0 || hours != 0 || mins != 0){out += mins +" minute"+((mins!=1)?"s":"")+", ";}
 out += secs +" seconds";
 document.getElementById('countbox').innerHTML=out;
 setTimeout("GetCount()", 1000);
 }
}
window.onload=GetCount;//call when everything has loaded

You can download the javascript file from here.

Setting Up Our thankyou.htm and error.htm files

Our thankyou.htm file is going to be the same as our index.html file but with a slight change. We will remove the signup form and place our thank you text in there. For this as well we will use the @fontface. Here is our thankyou.htm file:

1
2
3
4
5
6
7
8
9
10
11
12
13
14
15
16
17
18
19
20
21
22
23
<!DOCTYPE html PUBLIC "-//W3C//DTD XHTML 1.0 Transitional//EN" "http://www.w3.org/TR/xhtml1/DTD/xhtml1-transitional.dtd">
<html xmlns="http://www.w3.org/1999/xhtml">
<head>
<meta http-equiv="Content-Type" content="text/html; charset=utf-8" />
<title>Freelance Is My Life.....Well Not Yet But It Will Be</title>
<link href="../style.css" rel="stylesheet" type="text/css" />
<SCRIPT LANGUAGE="JavaScript" SRC="countdown.js"></script>
</head>
<body>
<div>
 <div></div>
 <div></div>
 <div><div id="countbox"></div></div>
 <div>
 <div id="information_woodencup"></div>
 <div id="information_text">My website will be up shortly. In the meantime please feel free to take a look at my <a href="http://custompowerdesigns.com/freelance-cv/" id="resume-link">online resume</a>. You can also check out some of our work on <a href="http://custompowerdesigns.deviantart.com" id="deviantart-link">deviantART</a>, <a href="http://www.flickr.com/photos/custompowerdesigns/" id="flickr-link">flickr</a>, or my <a href="http://www.facebook.com/pages/Pueblo-CO/Custom-Power-Designs/381376000380" id="facebook-link">facebook</a> page</div>
 </div>
 <div>  Thank You for submitting your email address. We will let you know as soon as my life becomes your reality!
</div>
</div>
</body>
</html>

Our error.htm file will have just one change from our index.html file as well, but instead of removing the input field , since we still need it, we will remove the countdown to alert our user that an error occurred. Here is our error.htm file:

1
2
3
4
5
6
7
8
9
10
11
12
13
14
15
16
17
18
19
20
21
22
23
24
25
26
27
28
<!DOCTYPE html PUBLIC "-//W3C//DTD XHTML 1.0 Transitional//EN" "http://www.w3.org/TR/xhtml1/DTD/xhtml1-transitional.dtd">
<html xmlns="http://www.w3.org/1999/xhtml">
<head>
<meta http-equiv="Content-Type" content="text/html; charset=utf-8" />
<title>Freelance Is My Life.....Well Not Yet But It Will Be</title>
<link href="../style.css" rel="stylesheet" type="text/css" />
</head>
<body>
<div>
 <div>Freelance is my life is coming soon.</div>
 <div>We have finished our Photoshop Document and are working on Coding our Home Page!</div>
 <div style="font-size: 32px">OOOOPS.....YOU MADE A MISTAKE....TRY AGAIN</div>
 <div>
 <div id="information_woodencup"></div>
 <div id="information_text">My website will be up shortly. In the meantime please feel free to take a look at my <a href="http://custompowerdesigns.com/freelance-cv/" id="resume-link">online resume</a>. You can also check out some of our work on <a href="http://custompowerdesigns.deviantart.com" id="deviantart-link">deviantART</a>, <a href="http://www.flickr.com/photos/custompowerdesigns/" id="flickr-link">flickr</a>, or my <a href="http://www.facebook.com/pages/Pueblo-CO/Custom-Power-Designs/381376000380" id="facebook-link">facebook</a> page</div>
 </div>
 <div>  <form action="MailForm.php" method="POST">
<input type="hidden" name="recipient" value="[email protected]">
<input type="hidden" name="subject" value="Contact From CPD Web">
<input type="hidden" name="redirect" value="signup/thankyou.htm">
<input type="hidden" name="required" value="name">
<input type="hidden" name="errorpage" value="signup/error.htm">
<input name="name" type="text" id="name" value="Your Email Address" size="30"><INPUT name="submit" type="submit"></form>
</div>
</div>
</body>
</html>

Conclusion

As you can see our Coming Soon Page is pretty simple. Once you have the countdown created there isn’t much to do other than code the remaining files. The good thing about this is that for the other two files you have to create, error.htm and thankyou.htm, you can just copy the code from your index file and change the two areas that you would like. Even the form mailer is something that most designers have lying around that you just re-use for this document (like we did).


Click Above Image To View Demo

Your ads will be inserted here by

AdSense Now!.

Please go to the plugin admin page to paste your ad code.

Freelance CV: PSD/HTML Conversion

Your ads will be inserted here by

AdSense Now!.

Please go to the plugin admin page to paste your ad code.

Good evening everybody, today I’ll be walking you through the process of coding your “Freelance CV / Resume” into a working HTML/CSS Template. Lets get started.

The Live Version

You can check out the Live Version of the template by clicking here. The template has been tested in the following browsers without any problems.

  • Firefox 2.0, 3.0 and 3.5
  • Internet Explorer 7 and 8
  • Chrome 3.0
  • Safari 3.0 and 4.0

Preparing Your Files

You will need to create a new folder on your desktop titled “Freelance CV”. Please create the following files: index.html, style.css, and a folder titled images. It should be set up like below:

Slicing the Document

Open your Freelance CV PSD file

Hit CTRL+ALT+I and resize to 1100*1187

Now its time to start slicing our document. Lets start out with the header. Slice it like the image below:

Once you have got your crop region down hide your bg layer and save the image as header.png

Slice your sub-header now using the below image:

Once you have your crop region down hide your bg layer and save the image as sub_header.png

Slice your four colored squares like below:

Once you have your cropped your document hide the background layer and save the image as four_colored_squares.png

Slice your spacer lines like the below image:

Once you have cropped your document hide the background layer and save the image as spacer_lines.png

Slice your wizard icon like below:

Once you have cropped your doc hide the bg layer and save the image as wizard.png

Slice your artwork icon like below:

Once you have cropped your doc hide the bg layer and save the image as artwork.png

Slice your play button icon like below:

Once you have cropped your doc hide the bg layer and save the image as play_button.png

Your ads will be inserted here by

AdSense Now!.

Please go to the plugin admin page to paste your ad code.

Slice your twitter icon like below:

Once you have cropped your doc leave the bg layer and save the image as twitter_icon.png

Slice your deviantart icon like below:

Once you have cropped your doc leave the bg layer and save the image as deviantart_icon.png

Since @fontface does not work in the majority of browsers we will not be using @fontface right now, though we will be adding the way to do use the @fontface later.

So, because we are not using it we will need to slice our four what we are good ats and our headers. You will slice them all like the images below and all will have the backgrounds hidden on them once cropped. The name to save them as will be under the respected images.


-graphic_design.PNG-


-javascript.PNG-


-css_html.PNG-


-php_mysql.PNG


-magical_design.PNG-


-creative_boundaries.PNG-


-design_life.PNG-

Now hide all your layers but your bg. Finally hit CTRL+S and save as FreelanceCVbg.jpg. Open your Freelance CV and crop like below:

save as bg.png

Setting Up Your CSS

1
2
3
4
5
6
7
8
9
10
11
12
13
14
15
16
17
18
19
20
21
22
23
24
25
26
27
28
29
30
31
32
33
34
35
36
37
38
39
40
41
42
43
44
45
46
47
48
49
50
51
52
@charset "utf-8";
/* CSS Document */
body {
}
.container {
}
.header {
}
#sub_header {
}
#graphic_design {
}
#javascript {
 }
.four_colored_square {
}
#css_html {
 }
#php_mysql {
}
.spacer_lines {
}
.wizard_overall {
}
#wizard_icon {
}
#wizard_header {
}
#wizard_header_text {
}
.artwork_overall {
}
#artwork_icon {
}
#artwork_header {
}
#artwork_header_text {
}
.playbtn_overall {
}
#playbtn_icon {
}
#playbtn_header {
}
#playbtn_header_text {
}
.socialnetwork_overall{
}
#twitter_icon {
}
#deviantart_icon {
}

Now, all our CSS is pretty self explanatory. I have set up the CSS in the normal way rather than to focus on page load speed.

Designing The Document

Now we will begin setting up our CSS, such as our container, header, and sub header. Please add the following CSS properties:

1
2
3
4
5
6
7
8
9
10
11
12
13
14
15
16
17
18
19
20
21
22
23
24
25
26
27
28
29
30
body {
 background-image: url(images/bg.PNG);
 background-repeat: repeat;
}
.container {
 height: 1210px;
 width: 1100px;
 margin-right: auto;
 margin-left: auto;
 color: #FFF;
}
.header {
 float: left;
 height: 62px;
 width: 1058px;
 margin-left: 21px;
 background-image: url(images/header.PNG);
 background-repeat: no-repeat;
 text-indent: -999px;
}
#sub_header {
 float: left;
 height: 40px;
 width: 854px;
 margin-left: 123px;
 background-image: url(images/sub_header.PNG);
 background-repeat: no-repeat;
 margin-top: 35px;
 text-indent: -999px;
}

Now to set up our document’s html:

1
2
3
4
5
6
7
8
9
10
11
12
<!DOCTYPE html PUBLIC "-//W3C//DTD XHTML 1.0 Transitional//EN" "http://www.w3.org/TR/xhtml1/DTD/xhtml1-transitional.dtd">
<html xmlns="http://www.w3.org/1999/xhtml">
<head>
<meta http-equiv="Content-Type" content="text/html; charset=utf-8" />
<title>[Insert Name]'s Online Resume / CV</title>
<link href="style.css" rel="stylesheet" type="text/css" />
</head>
<body>
<div class="container">
 <div class="header">Freelance Is My Life!</div>
 <div id="sub_header">My Name Is [Insert Name] and I Love Design</div>

Time to set up our “What I Know” rectangles and box. The CSS:

1
2
3
4
5
6
7
8
9
10
11
12
13
14
15
16
17
18
19
20
21
22
23
24
25
26
27
28
29
30
31
32
33
34
35
36
37
38
39
40
41
42
43
44
45
46
47
48
49
#graphic_design {
 float: left;
 height: 43px;
 width: 185px;
 margin-left: 80px;
 background-image: url(images/graphic_design.PNG);
 background-repeat: no-repeat;
 margin-top: 70px;
 text-indent: -999px;
}
#javascript {
 float: right;
 height: 43px;
 width: 185px;
 margin-right: 335px;
 background-image: url(images/javascript.PNG);
 background-repeat: no-repeat;
 margin-top: 70px;
 text-indent: -999px;
 }
.four_colored_square {
 float: left;
 height: 135px;
 width: 1025px;
 margin-top: 5px;
 margin-left: 37px;
 background-image: url(images/four_colored_squares.PNG);
 background-repeat: no-repeat;
 margin-bottom: 5px;
 text-indent: -999px;
}
#css_html {
 float: left;
 height: 43px;
 width: 226px;
 margin-left: 315px;
 background-image: url(images/css_html.PNG);
 background-repeat: no-repeat;
 text-indent: -999px;
 }
#php_mysql {
 float: right;
 height: 43px;
 width: 217px;
 margin-right: 65px;
 background-image: url(images/php_mysql.PNG);
 background-repeat: no-repeat;
 text-indent: -999in;
}

And our HTML:

1
2
3
4
5
<div id="graphic_design">Graphic Design -- 6 Years of Making Things Pretty</div>
 <div id="javascript">Javascript -- 5 Years of Making Things POP</div>
 <div class="four_colored_square"></div>
 <div id="css_html">CSS / HTML -- 5 Years of Making Your Vision A Reality</div>
 <div id="php_mysql">PHP and MySQL -- 3 Years of Coding and Scripting It All</div>

Now so far you are probably wondering why I have decided to add text to the divs, won’t that make it look different? No, by adding a text indent of -999px or -999in it means that the text won’t show on the website itself but the Search Engines will see the text, meaning that you are going to get better rankings because they will all be able to tell what the background image of the div actually says. I use this method when I am creating a coming soon page or something simple like this so that the Search Engines can start viewing the website right away.

Anyway, time to set up our icons and actual information. Here is the CSS:

1
2
3
4
5
6
7
8
9
10
11
12
13
14
15
16
17
18
19
20
21
22
23
24
25
26
27
28
29
30
31
32
33
34
35
36
37
38
39
40
41
42
43
44
45
46
47
48
49
50
51
52
53
54
55
56
57
58
59
60
61
62
63
64
65
66
67
68
69
70
71
72
73
74
75
76
77
78
79
80
81
82
83
84
85
86
87
88
89
90
91
92
93
94
95
96
97
98
99
100
101
102
103
104
105
106
107
108
.spacer_lines {
 float: left;
 margin-top: 45px;
 clear: both;
 background-image: url(images/spacer_lines.PNG);
 height: 20px;
 width: 915px;
 margin-left: 90px;
 margin-bottom: 45px;
}
.wizard_overall {
 float: left;
 height: auto;
 width: 680px;
 margin-left: 21px;
}
#wizard_icon {
 background-image: url(images/wizard.PNG);
 background-repeat: no-repeat;
 float: left;
 height: 109px;
 width: 95px;
 text-indent: -999px;
}
#wizard_header {
 background-image: url(images/magical_design.PNG);
 background-repeat: no-repeat;
 float: left;
 height: 18px;
 width: 543px;
 margin-left: 25px;
 text-indent: -999px;
}
#wizard_header_text {
 float: left;
 width: 570px;
 font-family: Arial, Helvetica, sans-serif;
 height: auto;
 padding-top: 10px;
 padding-left: 5px;
 margin-left: 10px;
}
.artwork_overall {
 float: right;
 height: auto;
 width: 770px;
 margin-right: 21px;
 clear: left;
 margin-top: 70px;
}
#artwork_icon {
 background-image: url(images/artwork.PNG);
 background-repeat: no-repeat;
 float: left;
 height: 77px;
 width: 79px;
 text-indent: -999px;
}
#artwork_header {
 background-image: url(images/creative_boundaries.png);
 background-repeat: no-repeat;
 float: right;
 height: 18px;
 width: 674px;
 text-indent: -999px;
}
#artwork_header_text {
 float: right;
 width: 640px;
 font-family: Arial, Helvetica, sans-serif;
 height: auto;
 padding-top: 10px;
 padding-right: 31px;
}
.playbtn_overall {
 float: left;
 height: auto;
 width: 680px;
 margin-left: 21px;
 clear: both;
 margin-top: 70px;
}
#playbtn_icon {
 background-image: url(images/play_button.PNG);
 background-repeat: no-repeat;
 float: left;
 height: 71px;
 width: 80px;
 text-indent: -999px;
}
#playbtn_header {
 background-image: url(images/design_life.png);
 background-repeat: no-repeat;
 float: left;
 height: 18px;
 width: 440px;
 margin-left: 25px;
 text-indent: -999px;
}
#playbtn_header_text {
 float: left;
 width: 580px;
 font-family: Arial, Helvetica, sans-serif;
 height: auto;
 padding-top: 10px;
 padding-left: 5px;
 margin-left: 10px;
}

Many people will disagree with putting underscores in the CSS, but I haven’t been able to see any downside in regards to the underscores. Now for the HTML:

1
2
3
4
5
6
7
8
9
10
11
12
13
14
15
16
17
<div class="spacer_lines"></div>
 <div class="wizard_overall">
 <div id="wizard_icon"></div>
 <div id="wizard_header">Making the World of Design Magical</div>
 <div id="wizard_header_text">lorem ipsum dolir lorem ipsum dolirlorem ipsum dolirlorem ipsum dolirlorem ipsum dolirlorem ipsum dolirlorem ipsum dolirlorem ipsum dolirlorem ipsum dolirlorem ipsum dolirlorem ipsum dolirlorem ipsum dolirlorem ipsum dolirlorem ipsum dolirlorem ipsum dolirlorem ipsum dolirlorem ipsum dolir.</div>
 </div>
 <div class="artwork_overall">
 <div id="artwork_icon"></div>
 <div id="artwork_header">Pushing the Boundaries of Creativity Further</div>
 <div id="artwork_header_text">lorem ipsum dolir lorem ipsum dolirlorem ipsum dolirlorem ipsum dolirlorem ipsum dolirlorem ipsum dolirlorem ipsum dolirlorem ipsum dolirlorem ipsum dolirlorem ipsum dolirlorem ipsum dolirlorem ipsum dolirlorem ipsum dolirlorem ipsum dolirlorem ipsum dolirlorem ipsum dolirlorem ipsum dolir.</div>
 </div>
 <div class="playbtn_overall">
 <div id="playbtn_icon"></div>
 <div id="playbtn_header">Bringing Life Back Into Design</div>
 <div id="playbtn_header_text">lorem ipsum dolir lorem ipsum dolirlorem ipsum dolirlorem ipsum dolirlorem ipsum dolirlorem ipsum dolirlorem ipsum dolirlorem ipsum dolirlorem ipsum dolirlorem ipsum dolirlorem ipsum dolirlorem ipsum dolirlorem ipsum dolirlorem ipsum dolirlorem ipsum dolirlorem ipsum dolirlorem ipsum dolir.</div>
 </div>
 <div class="spacer_lines"></div>

Adding Social Network: Now it is time to set up the CSS for the social networking aspects of the website.

1
2
3
4
5
6
7
8
9
10
11
12
13
14
15
16
17
18
19
20
21
22
23
.socialnetwork_overall{
 clear: both;
 float: left;
 height: auto;
 width: 840px;
 margin-left: 120px;
}
#twitter_icon {
 background-image: url(images/twitter_icon.PNG);
 background-repeat: no-repeat;
 float: left;
 height: 87px;
 width: 129px;
 text-indent: -999px;
}
#deviantart_icon {
 background-image: url(images/deviantart_icon.PNG);
 background-repeat: no-repeat;
 float: right;
 height: 87px;
 width: 150px;
 text-indent: -999in;
}

And now for our HTML; of course you will want to change the twitter and deviantART links to your own. The following HTML will also close our index.html document.

1
2
3
4
5
6
7
<div class="socialnetwork_overall">
 <a href="http://www.twitter.com/cpdpueblo" id="twitter_icon">Follow Me On Twitter</a>
 <a href="http://custompowerdesigns.deviantart.com/" id="deviantart_icon">Find My Art at DeviantART</a>
 </div>
</div>
</body>
</html>

Your ads will be inserted here by

AdSense Now!.

Please go to the plugin admin page to paste your ad code.

Pop-Up CSS Navigation Pt.2

Your ads will be inserted here by

AdSense Now!.

Please go to the plugin admin page to paste your ad code.

In this tutorial i’l be walking you through the process of converting the “Pop-Up Navigation” into a fully functional CSS navigation.


Creating The Navigation In Photoshop

If you haven’t already created the navigation you can do so by following “Part 1” of the tutorial “HERE“.

Creating The HTML Markup

Start a new HTML file inside your favorite HTML editor then save it right away inside a new folder on your desktop. Save the HTML file as “index.html”, create a blank CSS file also saving it right away inside the same folder as your HTML file. Save the CSS file as “style.css”.

Pop-Up Navigation Part 2


Inside your HTML document, within the “HEAD” tag link your stylesheet using the normal method.

1
<link href="style.css" rel="stylesheet" type="text/css" />

Inside the “BODY” tag of your HTML document create an empty DIV called “Container”.

1
2
<div id="container">
</div><!--container ends-->

The “Container” DIV will be the main DIV in which everything will sit inside.

Creating The Navigation Markup

Start off your navigation markup with an unordered list “UL”, the unordered list should have a class of “Navigation”.

1
2
3
4
5
6
<div id="container">
<ul class="navigation"
</ul>
</div><!--container ends-->

Inside the unordered list add 6 list items each with there own class. For the purpose of this tutorial i’ve gave each list a class of button1, button2, button3 etc…

1
2
3
4
5
6
7
8
9
10
11
<div id="container">
<ul class="navigation"
<li class="button1"><a href="#" title="PS">PS</a></li>
<li class="button2"><a href="#" title="DW">DW</a></li>
<li class="button3"><a href="#" title="ID">ID</a></li>
<li class="button4"><a href="#" title="AE">AE</a></li>
<li class="button5"><a href="#" title="AI">AI</a></li>
<li class="button6"><a href="#" title="FL">FL</a></li>
</ul>
</div><!--container ends-->

Pop-Up Navigation Part 2

Slicing Our Navigation At Normal State

Open your PSD file in photoshop, open up the layers palette, if it isn’t already open you can open it by pressing “F7″. Inside the layers palette locate your background snippet for each button.

Once you’ve located each background snippet highlight them by clicking each individual layer whilst holding down the “CTRL” key on the keyboard.

Pop-Up Navigation Part 2

When you’ve highlighted the background snippets go to “Layer > Merge Layers”. All the background snippet layers should be merged into one layer. Re-label the layer “Background Snippets” then drag the single layer right down to the bottom of the stack above your locked background layer.

Now highlight all your icon layers using the same method “CTRL + CLICK”. Merge the icons into one layer then drag them down to the bottom of the stack below your “Background Snippets” layer.

You now need to select all your shadow layers and merge them into one single layer. Drag the single shadow layer underneath your “background Snippets” layer. Finally do the same for your lines layers. (Note the order of the stack)

Pop-Up Navigation Part 2

Were now going to cut into the icons so we can get rid of our background snippets layer, doing this will make it easier to save the navigation image as a sprite.

Make a selection around your background snippets. You can do this quickly by holding down the “CTRL” key and clicking the little thumbnail in the layers window OR, select the background snippet layer and go to “Select > Load Selection”.

Pop-Up Navigation Part 2

Once you’ve loaded the selection around your background snippets select each other layer apart from the “Lines Layer” and “Background Layer” and hit the delete key. Finally delete the Background Snippets Layer”.

Pop-Up Navigation Part 2

Your ads will be inserted here by

AdSense Now!.

Please go to the plugin admin page to paste your ad code.

Save your PSD file, then open up your hover state PSD file.

Slicing Our Navigation At Hover State

Repeat all the steps explained above only this time do them on the hover state PSD file.

Pop-Up Navigation Part 2

Creating The Sprite

Re-open your normal state PSD file, select the rectangular marquee tool then make a selection around your navigation. Be sure to include the lines underneath each icon.

Pop-Up Navigation Part 2

Once the selection has been made hide the background layer and go to “Edit > Copy Merged”.

Create a new document by going to “File > New” then press ok (The dimensions of the selection should automatically be entered into the new document box). In the new document go to “Edit > Paste, your selection should now be pasted into the new document.

We now need to increase the canvas size to double the height of the navigation. Go to “Image > Canvas Size” in the box that opens pin the canvas to the top then increase the height to double the size.

Pop-Up Navigation Part 2

Open up your hover state PSD file, repeat the steps above then paste the navigation onto your new document canvas. Place the hover state navigation underneath the normal state navigation leaving no gap in between.

Pop-Up Navigation Part 2

Save the image as “Navigation.PNG” inside the same folder as your HTML file. If you wish to use your PSD background you will also need to make a slice over your background saving it as a separate PNG file.

Bringing It Together With CSS

Inside your CSS file start by styling the “BODY” and “CONTAINER”.

1
2
3
4
5
6
7
8
9
10
11
12
13
14
15
body {
padding: 0px;
background-image: url(bg.png);
background-repeat: repeat-x;
background-color: #ECEBEC;
margin-top: 20px;
margin-right: 0px;
margin-bottom: 0px;
margin-left: 0px;
}
#container {
margin: auto;
width: 600px;
}

In the “BODY” tag start off by setting all padding and margins to 0px apart from the top margin, we’ll add 20px of top margin which will push the navigation down from the top of our browser. Finally if your using your background from the PSD file then you’ll need to add the background as your body background image.

For the container DIV we simply set a margins to auto which will center our container, we can also set a fixed width for our container, 600px should be sufficient for the size of our navigation.

The next set of styles are for our navigation.

1
2
3
4
5
.navigation li {
float: left;
display: block;
list-style-type: none;
}

We’ll start with our navigation unordered list, simply float it left, display each list item as a block then remove the bullets points by setting the list style to none.

1
2
3
4
5
6
.navigation li a {
height: 53px;
width: 89px;
text-indent: -9999px;
display: block;
}

For our buttons links we set a fixed width and height. The width should be the same width as the buttons, if your buttons are different sized then it might be best to make sure they are all the same width. If you can’t make them the same width then you’ll have to set the fixed width in the classes button1, button2, button3 etc…

The fixed height should be the same height as your navigation. Don’t make the mistake of measuring the sprite.PNG image as you only need the height of one navigation not two.

Finally set the text indent to -9999px which will move the button labels off the page out of view.

1
2
3
4
5
6
7
8
9
10
11
12
13
14
15
16
17
18
19
20
21
22
23
24
25
26
27
28
29
30
31
32
33
34
35
li.button1 {
background-image: url(navigation.png);
background-repeat: no-repeat;
background-position: left top;
}
li.button2 {
background-image: url(navigation.png);
background-repeat: no-repeat;
background-position: -89px top;
}
li.button3 {
background-image: url(navigation.png);
background-repeat: no-repeat;
background-position: -166px top;
}
li.button4 {
background-image: url(navigation.png);
background-repeat: no-repeat;
background-position: -249px top;
}
li.button5 {
background-image: url(navigation.png);
background-repeat: no-repeat;
background-position: -334px top;
}
li.button6 {
background-image: url(navigation.png);
background-repeat: no-repeat;
background-position: right top;
}

For each button class you need to set your navigation image as the background then using the background position property adjust the background position to show each button on the image.

If you wish you can merge some of the styles as they share the same property’s, if you wish to merge your styles then place the class on the same line separated with a comma. Here’s the same code for the classes but merged.

1
2
3
4
5
6
7
8
9
10
11
12
13
14
15
16
17
18
19
20
21
22
23
24
25
26
27
28
li.button1, li.button2, li.button3, li.button4, li.button5, li.button 6 {
background-image: url(navigation.png);
background-repeat: no-repeat;
}
li.button1 {
background-position: left top;
}
li.button2 {
background-position: -89px top;
}
li.button3 {
background-position: -166px top;
}
li.button4 {
background-position: -249px top;
}
li.button5 {
background-position: -334px top;
}
li.button6 {
background-position: right top;
}

The Hover CSS

The code for the hover state of the buttons are pretty much the same as the default state of the navigation, the only difference is the background position is set to bottom instead of top.

1
2
3
4
5
6
7
8
9
10
11
12
13
14
15
16
17
18
19
20
21
22
23
24
25
26
27
28
29
30
31
32
33
34
35
li.button1 a:hover {
background-image: url(navigation.png);
background-repeat: no-repeat;
background-position: left bottom;
}
li.button2 a:hover {
background-image: url(navigation.png);
background-repeat: no-repeat;
background-position: -89px bottom;
}
li.button3 a:hover {
background-image: url(navigation.png);
background-repeat: no-repeat;
background-position: -166px bottom;
}
li.button4 a:hover {
background-image: url(navigation.png);
background-repeat: no-repeat;
background-position: -249px bottom;
}
li.button5 a:hover {
background-image: url(navigation.png);
background-repeat: no-repeat;
background-position: -334px bottom;
}
li.button6 a:hover {
background-image: url(navigation.png);
background-repeat: no-repeat;
background-position: right bottom;
}

Save your files and give it a whirl in your browser. You can view the live demo by clicking the button below.

Thanks for reading i’ll look forward to your comments.

Your ads will be inserted here by

AdSense Now!.

Please go to the plugin admin page to paste your ad code.

Learn-How to-Create a pop up style css navigation

Your ads will be inserted here by

AdSense Now!.

Please go to the plugin admin page to paste your ad code.

In this tutorial I’ll be walking you through the process of creating a pop-up style navigation. In the second part I’ll be walking you through the process of coding the navigation. Lets get going!


Resources Used In This Tutorial

What We’ll Be Creating

Click the image to view both hover state and normal state of the navigation.

Pop-Up Style Navigation

Getting Started

Create a new document 800 x 300 pixels, select a new foreground color #e1e1e1 and a new background color #ffffff. Select the gradient tool with a linear gradient.

Pop-Up Navigation

Drag the linear gradient over your canvas starting from the top then dragging down towards the bottom. Finally add some noise to your background by going to “Filter > Noise Add Noise”.

Pop-Up Navigation

Adding The Icons

Using your desired icons add them to your canvas, I’ll be using some photoshop icons by “Pkarwowski” you can grab them from here.

Pop-Up Navigation

Creating The Normal State

Select the rectangular marquee tool then make a small selection on the background, make sure the selection is on the same horizontal line as your icons due to the background being a gradient.

Pop-Up Navigation

Copy the selection then paste it to a new layer. Place the pasted bit of background over each icon.

Pop-Up Navigation

Your ads will be inserted here by

AdSense Now!.

Please go to the plugin admin page to paste your ad code.

Once you’ve pasted your background snippet over the icon, create two new layers above your background snippet layer. Select the rectangular marquee tool or the single row marquee tool and make a 1 pixel line on the edge of where the icon starts to disappear.

Pop-Up Navigation

Now that you’ve added your two lines add a layer mask to each of the two layers. Select the gradient tool with a reflect gradient, make sure white is set as your foreground color then drag from the middle of one of the lines towards either the left or right edge.

Repeat the same step for the second line. The look your going for is to have the lines slowly blend into the background. You should have something like this.

Pop-Up Navigation

Creating The Shadows

Select the elliptical marquee tool then drag out a small ellipse the same width as the icon. You only need the top of the ellipse to be actually overlapping onto the icon.

Pop-Up Navigation

Fill the selection with black (#000000) then apply a guassin blur by going to “Filter > Blur > Guassian Blur”, blur the ellipse by about 2- 3 px.

Pop-Up Navigation

That’s it the “Normal State” of the buttons are finished, save you PSD as “popup normal” then go to “File > Save As” and save the same file but under a new name like “popup hover”.

Creating The Hover State

Make sure your PSD “popup hover” is the one that’s open in photoshop. Select all your icon layers by holding down the CTRL key and selecting the layers, once you’ve selected all your icon layers select the move tool (V).

Move all your icons up so that just the bottom of the icons are covered by the background snippet.

Pop-Up Navigation

That’s your hover state finished, were now ready to start coding. Look our for part #2 coming soon.

Learn To Code This Navigation

Continue to the second part of this tutorial where we’ll be transforming the navigation into a live working menu. Click Here for Part #2.

Your ads will be inserted here by

AdSense Now!.

Please go to the plugin admin page to paste your ad code.

Carbon Fibre Style Inset Navigation: The Code

Your ads will be inserted here by

AdSense Now!.

Please go to the plugin admin page to paste your ad code.

Hello welcome to another tutorial by HV-Designs. In this tutorial il be showing you how to code the “Carbon Fibre Style Inset Menu” into a working CSS/HTML Document.


Follow Part 1

If you havent already created this navigation in photoshop you can do so by following PART 1 of the tutorial here.

View The Coded Version

You can view the full coded version here.

Coded Version

Setting Up Your Files

Before we even start slicing and dicing we first need to setup a few files. In a folder on your desktop you need a blank HTML file “index.HTML”, a blank CSS file “styles.CSS” inside another folder called “stylesheets”. Finally you need an empty folder for our images called “images”.

Inset Menu Coding Tutorial

The Markup

Open up your HTML file in your favorite code editor then within the “BODY” tag create a DIV ID of “container”. The container DIV will be our main container in which all our elements will be held.

<div id="container">
</div><!--CONTAINER ENDS-->

Inside the the “container DIV” create another DIV of “NAV”. The nav DIV will be the container for our navigation, the code looks like this.

<div id="container">

<div id="nav">
</div><!--NAV-->

</div><!--CONTAINER ENDS-->

Inside the “nav” DIV mock up a simple list. Start off with an unordered list (UL) with a class of “navigation”, inside the unordered list create your list (LI) elements. Each list (LI) element should be given its own class so that we can style each list (LI) object.

The markup looks like this.

<div id="container">

<div id="nav">

<ul class="navigation">
<li class="home"><a href="#" title="Home">Home</a></li>
<li class="services"><a href="#" title="Services">Services</a></li>
<li class="portfolio"><a href="#" title="Portfolio">Portfolio</a></li>
<li class="works"><a href="#" title="Works">Works</a></li>
<li class="contact"><a href="#" title="Contact">Contact</a></li>
</ul>

</div><!--NAV-->
</div><!--CONTAINER ENDS-->

That’s our markup pretty much finished, lets begin to slice our navigation.

Preparing Our Navigation Images

Believe it or not but the navigation is only made up of one image. We’ll use one big image of both the normal and hover state of the navigation then use CSS to change the background position, this technique is also known as “CSS Sprites“.

The cool thing about using CSS sprites is that the image is only loaded once and once its loaded your hovers will work perfectly without an mishaps. My image size is only a total of 80KB which is nothing by today’s standards. The image looks like this.

Inset Menu Coding Tutorial

Lets get started.

Open up your navigation PSD file in photoshop, select the rectangular marquee tool then make a selection around the whole navigation making sure everything is included in the selection.

Inset Menu Coding Tutorial

Once you’ve made the selection go to “image > crop”. After cropping the image you will notice how small the canvas area has now become, we need to increase the canvas height so that we can fit the same navigation on underneath the first one.

Find out how big your current canvas size is then times the height by 2. My canvas area is 179 pixels in height so if i multiply mine by 2, my new canvas size becomes 358 pixels. To increase the canvas area go to “image > canvas size”.

Inset Menu Coding Tutorial

You should now have something like this.

Inset Menu Coding Tutorial

Duplicating The Navigation

Before we duplicate the whole navigation remove the hover state effect from which ever button you applied it too (if any).

Your ads will be inserted here by

AdSense Now!.

Please go to the plugin admin page to paste your ad code.

Inset Menu Coding Tutorial

Select all layers to do with your navigation then duplicate them, keep them highlighted then move the whole navigation down directly underneath its original, be sure not to leave a gap between the two. You should have something like this.

Inset Menu Coding Tutorial

The top navigation will be how it will look once loaded in the browser, the bottom navigation is what it will look like when you hover over it.

On the bottom navigation you need to add your hover state to every button. Be sure not to move any of the text or the orb, as the slightest movement will be picked up in the browser.

Heres my complete navigation with the hover states added.

Inset Menu Coding Tutorial

Now before we save our navigation we need to remove the background layer so the two navigation’s are on a transparent background. Once you’ve removed the background save the image as “navigation.GIF” inside the images folder.

You will also need the brushed metal background in which we used for our navigation, just save it as “bg.PNG” inside the images folder.

Bringing It All Together

Open your “styles.CSS” file in your code editor so we can begin to add our CSS styles. The first set of styles are for our document background and container, the code looks like this.

body {
background-color: #c3c3c3;
background-image: url(../images/bg.gif);
background-repeat: repeat;
background-position: center top;
}

#container {
margin: auto;
width: 793px;
}

For the body we simply add our background image and repeat it, setting the background position to center top will ensure our background repeats from the top center of our browser.

For our container we set our margins to auto, this will center our contain within our browser. We then set a fixed width of 793 pixels, the fixed width should be the same width as our navigation image.

Inset Menu Coding Tutorial

The next set of styles are for our navigation container, navigation un-ordered list and list items.

#nav {
float: left;
width: 793px;
height: 179px;
}

.navigation li {
display: block;
float: left;
}

.navigation li a {
display: block;
float: left;
height: 179px;
text-indent: -9999px;
}

The main styles you need to be aware of are the fixed width and heights and the text indent. The fixed width’s should be the same width as the navigation image, the fixed heights should also be the same height as the navigation image.

The text indent hides the text labels by shifting them off the screen. The next set of styles are for navigation list (LI) items, if you can remember each list (LI) item had its own class assigned to it.

li.home a {
width: 160px;
background-image: url(../images/navigation.png);
background-repeat: no-repeat;
background-position: left top;
}

li.services a {
width: 158px;
background-image: url(../images/navigation.png);
background-repeat: no-repeat;
background-position: -160px top;
}

li.portfolio a {
width: 158px;
background-image: url(../images/navigation.png);
background-repeat: no-repeat;
background-position: -318px top;
}

li.works a {
width: 158px;
background-image: url(../images/navigation.png);
background-repeat: no-repeat;
background-position: -476px top;
}

li.contact a {
width: 159px;
background-image: url(../images/navigation.png);
background-repeat: no-repeat;
background-position: -635px top;
}

The styles on each list (LI) class are pretty simple, we basically add our navigation image as a background but change the background position of each list (LI) item. We also set a fixed width which reflects the width of each button. You can determine the width of each button by measuring the width in photoshop.


Inset Menu Coding Tutorial

The last and final set of styles we need to add are for our list (LI) hovers, the code is pretty much the same as the last set of styles we just need to adjust the background position so that the bottom navigation shows up.

li.home a:hover {
background-image: url(../images/navigation.png);
background-repeat: no-repeat;
background-position: left bottom;
}

li.services a:hover {
background-image: url(../images/navigation.png);
background-repeat: no-repeat;
background-position: -160px bottom;
}

li.portfolio a:hover {
background-image: url(../images/navigation.png);
background-repeat: no-repeat;
background-position: -318px bottom;
}

li.works a:hover {
background-image: url(../images/navigation.png);
background-repeat: no-repeat;
background-position: -476px bottom;
}

li.contact a:hover {
background-image: url(../images/navigation.png);
background-repeat: no-repeat;
background-position: -635px bottom;
}

That’s it all done, you can test the navigation by clicking the button at the bottom, also look out for the FREE downloaded version soon.

Thanks for reading.


Your ads will be inserted here by

AdSense Now!.

Please go to the plugin admin page to paste your ad code.

Twitter Followers As Text

Your ads will be inserted here by

AdSense Now!.

Please go to the plugin admin page to paste your ad code.

After launching the HV-Designs blog i started recieving alot of e-mails asking me how i displayed my twitter count as pure text. In this post il show you how.


Quick Note

Now before i start i just want to say “I did not write the code” im about to show you. So don’t credit me for it. The code was actually written by someone called “Rarst“.

Creating The PHP File

Start off by creating a blank PHP file in your favourite code editor, il be using dreamweaver for this tutorial.

Once you’ve created your blank PHP document copy and paste the following lines of code.

<?php
$tw = get_option("twitterfollowerscount");
if ($tw['lastcheck'] < ( mktime() - 3600 ) )
{
$xml=file_get_contents('http://twitter.com/users/show.xml?screen_name=YOUR-FEED');
if (preg_match('/followers_count>(.*)</',$xml,$match)!=0) {
$tw['count'] = $match[1];
}
$tw['lastcheck'] = mktime();
update_option("twitterfollowerscount",$tw);
}
echo $tw['count'];
?>

What The Code Does

The first couple of lines grab the twitter count, notice the “mktime 3600″. This means the twitter count will get called every 3600 seconds or every hour instead of calling it on every page load.

The next couple of lines indicate your twitter feed.

$xml=file_get_contents('http://twitter.com/users/show.xml?screen_name=YOUR-FEED');

Your ads will be inserted here by

AdSense Now!.

Please go to the plugin admin page to paste your ad code.

Where it says “YOUR-FEED” you need to put your twitter name, my twitter is “hvdesigns” so id put in “hvdesigns”.

$xml=file_get_contents('http://twitter.com/users/show.xml?screen_name=hvdesigns');

Save your file as “twitter.php” inside your website’s directory.

Displaying The Twitter Count

Inside your your wordpress theme just add the following code where you want the numbers to display.

<?php include("twitter.php"); ?>

You can easily change the way the twitter count looks by using CSS. For example my twitter count looks like this.

HTML

<p><span class="twitter-followers"><?php include("twitter.php"); ?></span> Followers</p>

CSS

p {
color:#fff;
}

span.twitter-followers {
font-size: 24px;
vertical-align: middle;
padding-left: 5px;
color: #1e96db;
}

RSS Subscribers

A while back i also written a tutorial on how to do the same thing with your RSS subscribers, you can view the tutorial HERE.

Your ads will be inserted here by

AdSense Now!.

Please go to the plugin admin page to paste your ad code.

Windows 7 Navigation Code

Your ads will be inserted here by

AdSense Now!.

Please go to the plugin admin page to paste your ad code.

hello, welcome, in this tutorial il be showing / explaining how to transform the windows 7 inspired navigation into a fully working CSS navigation.


Lets Get Started!

Before we start diving into the HTML and CSS we need to make a few adjustments to the PSD file and create a background to demonstrate the PNG transparancy. We’ll start with the background first.

Create a new document 800 x 600 pixels, set your foreground color to #1592d7 and background color to #136da2. Select the gradient tool with a radial gradient.

Step1

Once you’ve selected the gradient tool start from the middle of the canvas and drag downwards about half-way. Create a new layer above your background layer then select the custom shape tool from the menu on the left.

Step2

Once you’ve selected the tool, at the top you’ll see the word shape, click the little arrow to open the shapes panel. Find the “registration target” shape.

Step3

If you dont see then registration target shape click the little black arrow in the top right hand corner, you and load more preset shapes there. Once you’ve selected the shape drag it out over your canvas, make the shape as big as you can. Place the shape so that the streaks are flowing nicely over the canvas.

Fill the shape with the color white then add a guassian blur of 5pixels. Finish off by setting the layer opacity to 30% and blending mode to overlay.

We now need to blend in our streaks with the background, add a layer mask to the streaks layer, select the gradient tool with a linear gradient. Drag the linear gradient from the left of the canvas towards the right, BUT dont go all the way across the canvas, you just want to fade in the edges. Repeat the process for the right side also, you should have something like this.

Step4

Create a new folder for your navigation, inside this folder create another folder called images. Save the background as “background.png” inside the images folder.

Modifying The PSD File

Open up your windows 7 navigation PSD file, select the zoom tool and zoom into the top and bottom lines.

Step5

Select the eye dropper tool and pick the colors of the white and black line.

Step6

Re-create the top and bottom lines using the colors from the eye dropper. The reason were doing this is because the lines were orginally white and black with the opacity lowered. When we save the images for the navigation the lines wont retain there opacity, they’l simply change back to black and white.

Slicing The Navigation Background

Select the rectangular marquee tool and make a 1 pixel wide selection around the navigation background. Hide the background layer and the white streaks layer.

Step7

Once you’ve made the selection go to “edit > copy merged”. Create a new document, the dimensions of the selection should automatically be inputted into the dimension fields. Paste the selection into the new document then delete the background layer, save the image as “navigation_background.png” inside the images folder.

Slicing The Navigation Button

Still with the rectangular marquee tool this time make a selection around one of the buttons.

Step8

Your ads will be inserted here by

AdSense Now!.

Please go to the plugin admin page to paste your ad code.

Once you’ve made the selection hide the background and background streaks then go to “edit > copy merged”, copy and paste the selection to a new document and save as “nav_button.png” on a transparent background inside the images folder.

Creating The Hover Button

Duplicate the button shine layer then change the gradient overlay to the following settings.

Step9

Hide the orginal button shine layer, then select the rectangular marquee. With the rectangular marquee tool make a selection around the new button.

Step10

Hide your background layer and the white streaks layer then go to “edit > copy merged”, paste the selection to a new document with a transparent background. Save the image as “nav_hover.png” inside the images folder.

Were now ready to start coding.

Setting Up Our Files

You should already have a folder in which we created earlier, inside the folder create a blank CSS and HTML file. You should have 2 files and 1 folder, index.html, styles.css and a folder called images.

Open up your HTML and CSS file in your code editor. The first thing we’l do is add our 800×600 pixel background so that we can see that the PNG files are still transparent.

In your CSS file add the following code.

1
2
3
4
5
6
7
8
9
body {
    background-color: #1570a4;
    background-image: url(../images/background.png);
    background-repeat: no-repeat;
    background-position: center top;
    font-family: Verdana, Arial, Helvetica, sans-serif;
    font-size: 12px;
    margin-top: 10px;
}

Marking Up The Containers

Before we start with all the navigation stuff lets first create a couple of containers so that our navigation centers across our streaky background. Create a new DIV called container, inside the container DIV create another DIV called navigation1.

The menu im going to show you how to code will be a fixed width menu spanning 800 pixels. There are four menus in total but im only showing you this one, il provide all menus for you to download though.

1
2
3
4
<div id="container">
<div id="navigation1">
</div><!--NAVIGATION 1 ENDS-->

In your CSS file add the following CSS rules.

1
2
3
4
5
6
7
8
9
10
#container {
    width: 800px;
    margin: auto;
}
#navigation1 {
    height: 50px;
    float: left;
    width: 800px;
}

The container styles are pretty simple, were just setting a fixed width of 800 pixels and setting the margins to auto, settiing the margins to auto will center the container in a browser. The navigation 1 DIV is pretty much the same only this time its floated left and has a fixed hieght. The fixed height is the height of our navigation image.

Marking Up The Navigation

Now mark-up a simple navigation using an unordered list inside the DIV navigation1. The code should look something like this.

1
2
3
4
5
6
7
8
9
10
11
12
<div id="navigation1">
<ul class="nav1">
<li><a href="#" title="#">Button1</a></li>
<li><a href="#" title="#">Button2</a></li>
<li><a href="#" title="#">Button3</a></li>
<li><a href="#" title="#">Button4</a></li>
<li><a href="#" title="#">Button5</a></li>
<li><a href="#" title="#">Button6</a></li>
<li><a href="#" title="#">Button7</a></li>
<li><a href="#" title="#">Button8</a></li>
</ul>
</div><!--NAVIGATION 1 ENDS-->

We start off with an un-order list which has a class of “nav1″, we then have our list items with our links.

Adding The CSS Code

1
2
3
4
5
6
7
8
9
10
11
12
13
14
15
16
17
18
19
20
21
22
23
24
.nav1 li {
    display: block;
    background-image: url(../images/nav_button.png);
    background-repeat: no-repeat;
    float: left;
}
.nav1 li a {
    display: block;
    float: left;
    height: 50px;
    width: 91px;
    text-align: center;
    text-decoration: none;
    font-size: 12px;
    color: #FFFFFF;
    line-height: 48px;
}
.nav1 li a:hover {
    color: #FFFFFF;
    background-image: url(../images/nav_button_hover.png);
    background-repeat: no-repeat;
}

CSS Code Explained

We start off by styling our individual list items (li), each link will be displayed as a block element which is floated left. We then add our navigatiob button PNG as a background then set the background-repeat property to no repeat.

Next we have our list links (li a), the links are also displayed as a block element and floated left. Any text inside the list will be centered, will have a font size of 12px in the color white (#ffffff) and finally have a line height of 48px. The line height pushes the text into the center of the button vertically. Each link item will also have a fixed width and height, the width and height should be the same as your nav-button image.


Step11

Finally we style our hover state of our navigation (li a:hover), we simply add a navigation hover button as background which isn’t repeated. You can also change the color of the text if you wish or keep it set to white (#ffffff).

The DEMO

Heres the demo for you all to look at, ive provided 4 navigations some with text and some with icons, the menus also range from fixed width menus or ones with 100% width background. The navigations should all be transparent without using any additional CSS code, try using a busy background to really notice the difference.

Windows 7 Navigation Demo

Thanks

Thats it for this tutorial, hope you found it worth reading. Dont forget to DIGG and RE-Tweet, your help is much appreciated.

Your ads will be inserted here by

AdSense Now!.

Please go to the plugin admin page to paste your ad code.