Your ads will be inserted here by
AdSense Now!.
Please go to the plugin admin page to paste your ad code.
BEFORE YOU START DOWNLOAD THE PATTERN FILE HERE
place it into your adobe directory E.G (C:Program FilesAdobeAdobe Photoshop CS2PresetsPatterns).
Create a new document 500×500 pixels, select the color “d2d2d2″ then select the “rectangle tool” or press the letter “U” then draw out a rectangle. Make it look like a small A4 peice of paper. Now right click the layer that has been created and goto “blending options” and goto pattern overlay. then take the following steps.
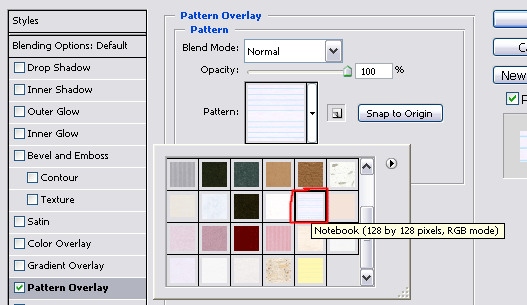
1. click pattern overlay,
2. click the arrow next to the pattern selction
3. click the little arrow for extra options
4. click color paper
here is the image that the numbers corrospond to. (hope ive made easy enough to understand).

Now when the new set of patterns are loaded into photoshop scroll down and select the notebook pattern (see image below).
If you followed the above correctly you should have something like below.

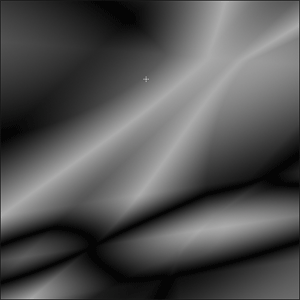
Now lets add our wrinkles, create a new document 500×500 pixels select the color black and a light grey, then select the gradient tool. Change the mode to “difference”
![]()
Your ads will be inserted here by
AdSense Now!.
Please go to the plugin admin page to paste your ad code.
Now just drag random gradients on your canvas all on the same layer till you get an effect like this.
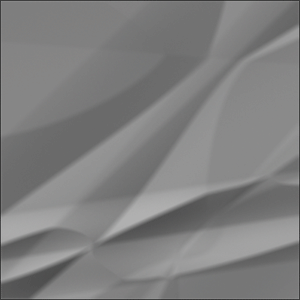
Once you have a effect like above (baring in mind it wont be the exact same as mine) goto “filter > stylize > emboss” use standard settings. You should have something like this.
Now “right-click” your background layer and select “layer from background” and click ok to the box that comes up, now click the layer while holding the “ctrl” key on the keyboard, this will select it now copy “edit > copy” or “ctrl + c”.
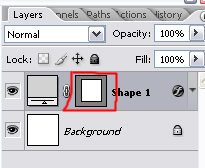
Now divert back to you piece of paper your prevously made and click on the “SECOND” box on your layer whilst holding down “ctrl”.
This will select your paper, Now goto “edit > paste into” or press “shift + ctrl + v”. The new layer that has been created set the layer mode to “hard light”. Now give it a drop shadow and a black 1 pixel stroke and your done, it should look like this.

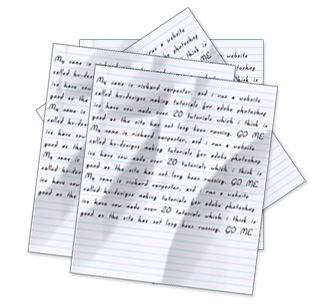
Heres just a little pile of paper i made using this tutorial.
Your ads will be inserted here by
AdSense Now!.
Please go to the plugin admin page to paste your ad code.