Your ads will be inserted here by
AdSense Now!.
Please go to the plugin admin page to paste your ad code.
Yep, another new tutorial author has joined the team here at HV-Designs and his first tutorial is awesome! Josh will be walking you through some simple Adobe Illustrator techniques on creating vector shapes and bringing them to photoshop and then applying some photoshop techniques to bring it all together. Let’s get started!
Getting Started
Quick video showing the sketch of our icon.
http://www.youtube.com/watch?v=-7zpE4clH48
Now that we know about what we want to achieve, lets head over to Adobe Illustrator to get started. When designing an icon, its best to work in a vector based program to achieve the utmost in detail, and the ability to resize without quality loss.
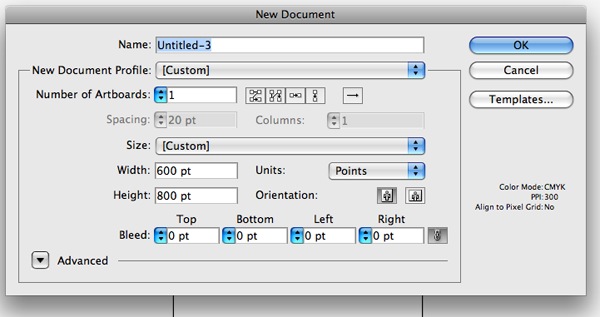
Step 1:
Open a new document in illustrator, 600px wide by 800px high.
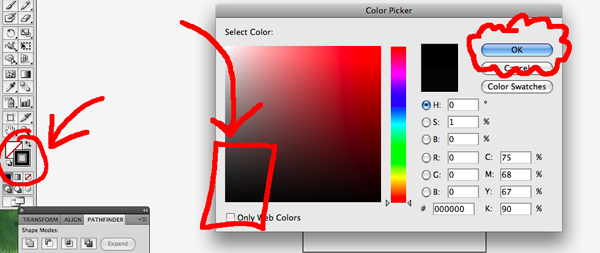
Step 2:
WIth your blank document open, choose a dark colored stroke. We will change this color later, but it ensures that we can easily see what we are working with while we are drawing the outline of our cup.
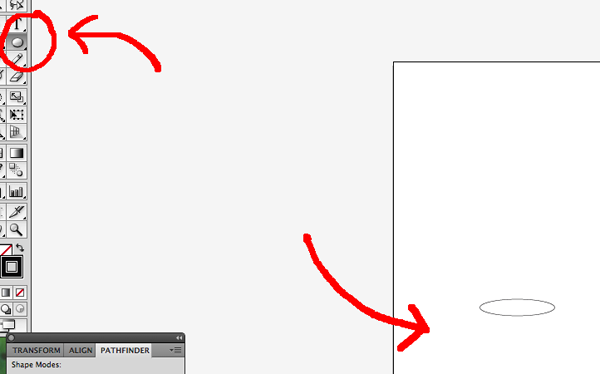
Step 3:
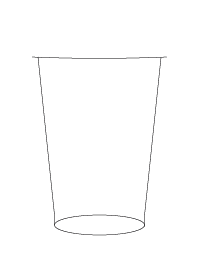
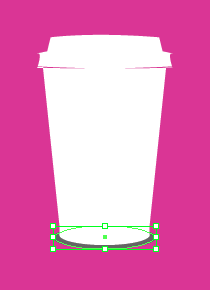
Choose the Ellipse tool (Shortcut: ‘L’), and draw an oval shape as shown. This will represent the bottom ellipse of the cup.
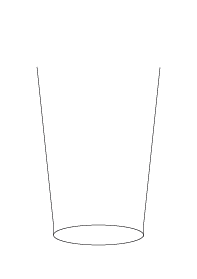
Step 4:
Create a new layer. I always feel separating pieces into layers makes life easier later. You can always merge layers if necessary.
We are going to create the outer edges of the cup.
Choose the Pen tool (Shortcut ‘P’), and stay with the dark stroke color, no fill color.
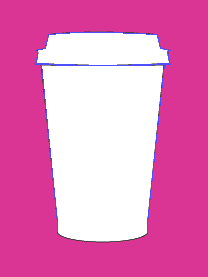
Choose a point at the top of the cup (it will be right under the lid), and select a second point toward the bottom of the cup. If you notice, we didn’t select a point that joins the line to the bottom Ellipse, this is because there is actually a small vertical line where the bottom of the cup has extra support for holding in drinks (I suppose), so then finish the line by connecting it to the bottom ellipse with a short vertical line.

Step 5:
Next, select the line we just drew in Step 4, copy it, and paste it on the same layer. Next, go to ‘Object –> Transform –> Reflect’, and choose ‘Vertical’. Now, move it into place on the opposite side of the cup.
Step 6:
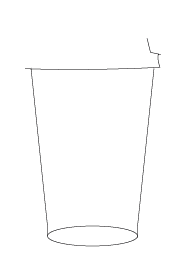
Next we work on the lid. Make a new layer. Choose the Pen tool (‘P’), and select a point slightly beyond the left side of the cup. Choose a second point in line with the first on a horizontal plane, and slightly outside the right side of the cup. Set up guides if you must. Next, without letting go of the mouse button on your second point, drag your line to give it a very slight curve.
Step 7:
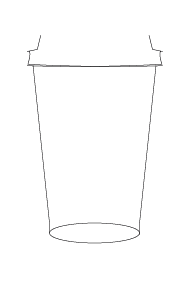
Now we will work on the contour of the outer edge of the lid. First, make a new layer in your layers palette. Next, With your pen tool selected (‘P’), draw the outer edge of the lid.
Step 8:
Next, select the outer edge of the lid that we just drew, and copy it, and paste in front (Command + F). Next, go to ‘Object –> Transform –> Reflect’, and choose ‘Vertical’. This gives us an identical replica of the lid edge. Now move it to its respective location.
Step 9:
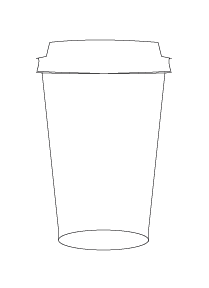
Now, using the Pen tool (‘P’), connect the top of the lid, and upon choosing the second point, hold your click and drag to give the top of the lid a light upper curve.
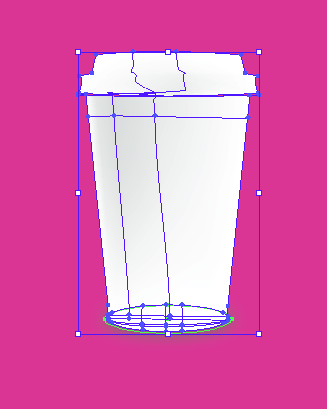
Step 10:
Now that we have the outline complete, lets work on some shading. Since our cup is mainly white, lets set up a darker background so we can see what we are working with. Choose the Rectangle tool (‘M’). Also, choose a darker color (we are using Pink), and set the stroke to empty. Make a rectangle the size of the canvas. Next, cut the rectangle (Command + X), and paste in back (Command + B). With the rectangle selected, let’s lock the selection. Choose ‘Object –> Lock –> Selection (Command + 2). You’ll also want to make sure this is placed in the lowest, or first layer (most likely layer 1).

Step 11:
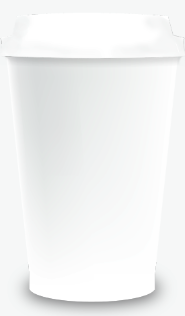
Next, we will change the fill color to white. Select all of your paths with the Selection Tool (‘V’). Just drag a square around the cup outline. This is why we locked the Pink layer. Then, in your tool palette, change the fill color to white. This probably will leave the center empty still. No problem. Go to to toolbar, and choose ‘Object –> Path –> Join’ (Command + J). This should give you something that looks much more like a coffee cup ![]()
Step 12 / 13:
Next, we shade. Make a new layer just above the Pink rectangle layer. Draw an ellipse with a fill of #777777 and no stroke. Make sure it is set behind the Cup.
Then, we will add a Gaussian blur to the shape. With the Ellipse selected, go to ‘Effect –> Blur –> Gaussian Blur’. Put in something like 45px, and hit ‘Ok’. Adjust as needed.

Step 14:
Next, selecting the Gradient mesh tool. It is so hard to explain how this tool works. Play around with it until you find a desired result. As you see in the image below, we went very light with the shading. Our next step is moving to Photoshop because personally, I find some shading techniques easier there.
Step 15:
Select your entire cup, shading included. Copy it. Open a new document in Photoshop. Paste it as a smart object. Hit enter.
Your ads will be inserted here by
AdSense Now!.
Please go to the plugin admin page to paste your ad code.

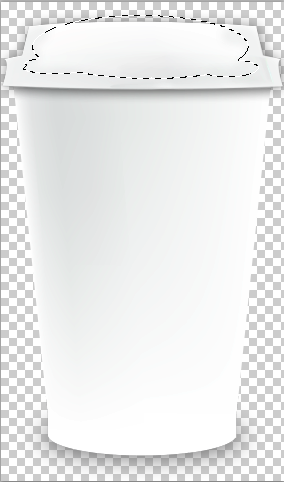
Step 16:
Since it will paste as one layer, using the Elliptical Marquee tool (‘M’), make a short and wide selection to ‘cut’ the top off of the cup.
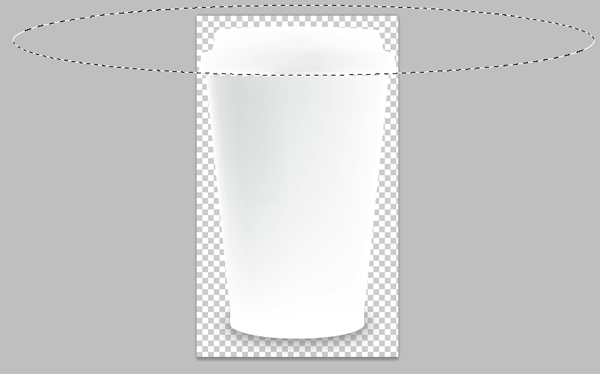
Cut the seleciton, and paste to a new layer. This allows us to overlap the ‘Lid’ ontop of the cup base. You’ll see why next.
Note: You may have to rasterize the layer in order to edit the ‘Smart Object’. This is ok, since the Icon is so large at this point, we won’t need to make it any larger.
Step 17:
Next, with the lid layer selected, Control-Click on the layer, and select blending options.
On the left tab, click ‘Drop Shadow’ and see the image below for the specific settings. Choose your own, or use the same as we did. Feel free to play around with the settings.

Step 18:
Now that we have our drop shadows down, lets work on shading the lid. On the tool bar, select the burn tool. This is a great way to add subtle shading. Make a new layer in the layers palette. Go to town with some subtle burning. Use a 75px soft edged brush.
Step 19:
Make a new layer. Using the Elliptical Marquee tool (‘M’), make multiple ellipse shapes to define the highlights. Too add to a selection, hold in the ‘Shift’ key while you make a new selection.
Fill this selection with a light color. Maybe a tad darker than white, with a yellowish tone. Try #f9faf9.

Step 20:
You’ll notice the highlight overlaps our lid. No problem. Take the lid layer, and duplicate it. Next, Control+Click to bring up the Blending Options. Go down to color overlay, and choose something, anything. White is fine. Make sure the drop shadow and any other options are turned off. Hit Ok.
Next, choose the ‘Magic Wand’ tool (‘W’), and select the white colored overlay. Next, go to the menu bar, and choose ‘Select –> Inverse’. Click ‘Delete’ on that layer. Overlap gone. Next, drop the opacity to your liking, as well as adding a slight Gaussian Blur.
Then, create a new layer in the utmost background, and fill it with a color a shade yellower than white.
Step 21:
Next, we’ll add some darker shading to show come curvature on the lid. You can achieve this in many ways, either the Pen tool, or make a selection and fill it, etc. I used a combination of both, along with the burn tool.
Step 22:
We can go in and do some cleaning up with the dodge, burn, and eraser tools. Play with opacity and shading to add the finishing touches. Its nice to add a highlight around some of the edges to help it roll into the shadows and give curvature to the edges.
If there are any areas where the drop shadow or shading went over the edges of the cup, feel free to duplicate a main layer (cup or lid), color overlay, select, select inverse, and delete.
Step 23:
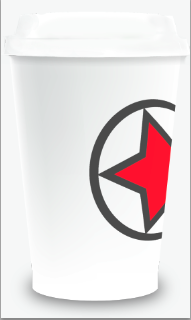
Now its time to add some of the finishing touches. Lets add a logo.
Find or make one you’d like to use, and paste it in a new layer.

Now we have to add some contour to the mark. With the layer selected, go to ‘Filter –> Distort –> Spherize’. Tweak until correct.
Place where you think it looks best. To handle the overlap, turn off all layers but the ‘Cup’ layer. Select the negative space. Now select the ‘Mark or Logo’ layer, and delete the overlap. Take the opacity down a hair to inherit some of the shadow.
Step 24:
Next, create a rectangle using the ‘Rectangle Tool’ to represent the checkboxes. To do so, select an empty fill rectangle in the top tool bar, and give it a 1 point stroke in a dark color. Duplicate the rectangle layer until you have 4, space them accordingly, and merge all the layers together into 1.
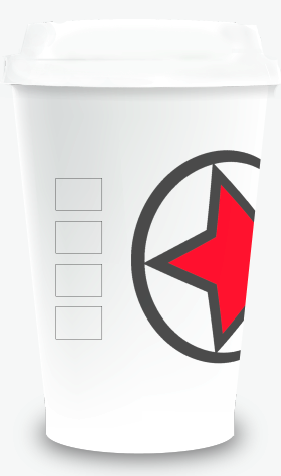
Using the ‘Skew’ tool (‘Edit –> Transform –> Skew’), play with the checkboxes until you feel they look as if they are flowing with the curvature of the cup.
Move the checkboxes until you are satisfied with their placement.
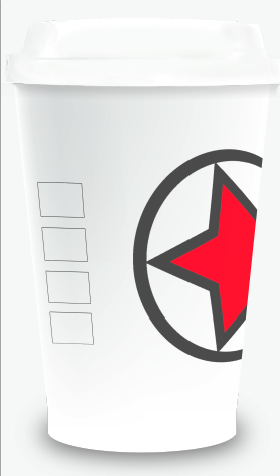
Step 25:
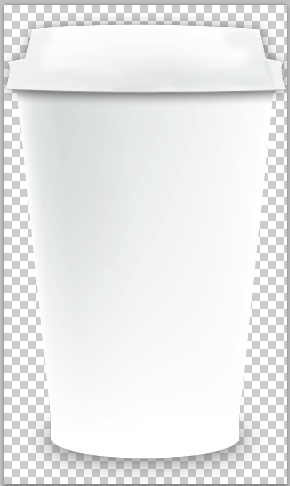
Play around with the background, and voila. You have yourself a coffee cup icon, or a ‘Zohf-ee’ cup icon ![]()
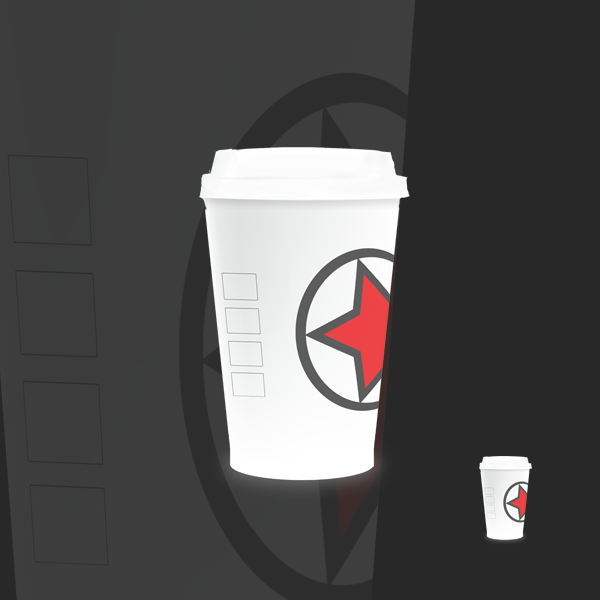
Thanks for following this tutorial. Hopefully it was helpful.
Your ads will be inserted here by
AdSense Now!.
Please go to the plugin admin page to paste your ad code.