Your ads will be inserted here by
AdSense Now!.
Please go to the plugin admin page to paste your ad code.
If actions speak louder than words, then in the JavaScript world, effects make actions speak louder still. With jQuery, we can easily add impact to our actions through a set of simple visual effects, and even craft our own, more sophisticated animations.
Inline CSS Modification
Before we jump into the nifty jQuery effects, a quick look at CSS is in order. One way of modifying a document’s appearance is by defining styles for classes in a separate stylesheet and then adding or removing those classes with jQuery. Typically, this is the preferred process for injecting CSS into HTML because it respects the stylesheet’s role in dealing with the presentation of a page. However, there may be times when we need to apply styles that haven’t been, or can’t easily be, defined in a stylesheet. Fortunately, jQuery offers the .css() method for such occasions.
This method acts as both a getter and a setter. To get the value of a style property, we simply pass the name of the property as a string, like .css(‘backgroundColor’). Multi-word properties can be interpreted by jQuery when hyphenated, as they are in CSS notation (background-color), or camel-cased, as they are in DOM notation (backgroundColor). For setting style properties, the .css() method comes in two flavors—one that takes a single style property and its value and one that takes a map of property-value pairs:
.css('property','value')
.css({property1: 'value1', 'property-2': 'value2'})
Experienced JavaScript developers will recognize these jQuery maps as JavaScript object literals.
Numeric values do not take quotation marks while string values do. However, when using the map notation, quotation marks are not required for property names if they are written in camel-cased DOM notation.
We use the .css() method the same way as using .addClass() —by chaining it to a selector and binding it to an event. To demonstrate this, we’ll use the style switcher example.
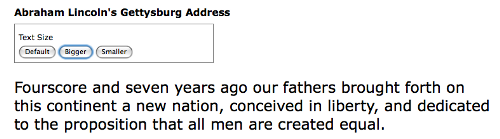
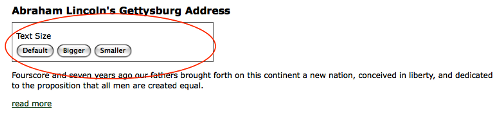
<div id="switcher">
<div class="label">Text Size</div>
<button id="switcher-default">Default</button>
<button id="switcher-large">Bigger</button>
<button id="switcher-small">Smaller</button>
</div>
<div class="speech">
<p>Fourscore and seven years ago our fathers brought forth
on this continent a new nation, conceived in liberty,
and dedicated to the proposition that all men are created
equal.</p>
</div>
By linking to a stylesheet with a few basic style rules, the page can initially look like the following screenshot:

In this version of the style switcher, we’re using button elements. Clicking on the Bigger and Smaller buttons will increase or decrease the text size of div class speech, while clicking on the Default button will reset div class speech to its original text size.
If all we wanted were to change the font size a single time to a predetermined value, we could still use the .addClass() method. But let’s suppose that now we want the text to continue increasing or decreasing incrementally each time the respective button is clicked. Although it might be possible to define a separate class for each click and iterate through them, a more straightforward approach would be to compute the new text size each time by getting the current size and increasing it by a set factor (for example, 40%).
Our code will start with the $(document).ready() and $(‘#switcher-large’).click() event handlers:
$(document).ready(function() {
$('#switcher-large').click(function() {
});
});
Next, the font size can be easily discovered by using the .css() method: $(‘div.speech’).css(‘fontSize’). However, because the returned value will include a trailing ‘px’, we’ll need to strip that part in order to perform calculations with the value. Also, when we plan to use a jQuery object more than once, it’s generally a good idea to cache the selector by storing the resulting jQuery object in a variable as well.
$(document).ready(function() {
var $speech = $('div.speech');
$('#switcher-large').click(function() {
var num = parseFloat($speech.css('fontSize'), 10);
});
});
The first line inside $(document).ready() now stores a variable for “div class=”speech” itself. Notice the use of a $ in the variable name, $speech. Since $ is a legal character in JavaScript variables, we can use it as a reminder that the variable is storing a jQuery object.
Inside the .click() handler, we use parseFloat() to get the font size property’s number only. The parseFloat() function looks at a string from left to right until it encounters a non-numeric character. The string of digits is converted into a floating-point (decimal) number. For example, it would convert the string ’12′ to the number 12. In addition, it strips non-numeric trailing characters from the string, so ’12px’ becomes 12 as well. If the string begins with a non-numeric character, parseFloat() returns NaN, which stands for Not a Number. The second argument for parseFloat() allows us to ensure that the number is interpreted as base-10 instead of octal or some other representation.
All that’s left to do, if we are increasing by 40%, is to multiply num by 1.4 and then set the font size by concatenating num and ‘px’:
$(document).ready(function() {
var $speech = $('div.speech');
$('#switcher-large').click(function() {
var num = parseFloat($speech.css('fontSize'), 10 );
num *= 1.4;
$speech.css('fontSize', num + 'px');
});
});
The equation num *= 1.4 is shorthand for num = num * 1.4. We can use the same type of shorthand for the other basic mathematical operations, as well: addition, num += 1.4; subtraction, num -= 1.4; division, num /= 1.4; and modulus (division remainder), num %= 1.4.
Now when a user clicks on the Bigger button, the text becomes larger. Another click, and the text becomes larger still, as shown in the following screenshot:
To get the Smaller button to decrease the font size, we will divide rather than multiply —num /= 1.4. Better still, we’ll combine the two into a single .click() handler on all “button” elements within
$(document).ready(function() {
var $speech = $('div.speech');
$('#switcher button').click(function() {
var num = parseFloat( $speech.css('fontSize'), 10 );
if (this.id == 'switcher-large') {
num *= 1.4;
} else if (this.id == 'switcher-small') {
num /= 1.4;
}
$speech.css('fontSize', num + 'px);
});
});
We can access the id property of the DOM element referred to by this, which appears here inside the if and else if statements. Here, it is more efficient to use this than to create a jQuery object just to test the value of a property.
It’s also nice to have a way to return the font size to its initial value. To allow the user to do so, we can simply store the font size in a variable immediately when the DOM is ready. We can then use this value whenever the Default button is clicked. To handle this click, we could add another else if statement. However, perhaps a switch statement would be more appropriate.
$(document).ready(function() {
var $speech = $('div.speech');
var defaultSize = $speech.css('fontSize');
$('#switcher button').click(function() {
var num = parseFloat( $speech.css('fontSize'), 10 );
switch (this.id) {
case 'switcher-large':
num *= 1.4;
break;
case 'switcher-small':
num /= 1.4;
break;
default:
num = parseFloat(defaultSize, 10);
}
$speech.css('fontSize', num + 'px');
});
});
Here we’re still checking the value of this.id and changing the font size based on it, but if its value is neither ‘switcher-large’ nor ‘switcher-small’ it will default to the initial font size.
Basic Hide and Show
The basic .hide() and .show() methods, without any parameters, can be thought of as smart shorthand methods for .css(‘display’,’string’), where ‘string’ is the appropriate display value. The effect, as might be expected, is that the matched set of elements will be immediately hidden or shown, with no animation.
The .hide() method sets the inline style attribute of the matched set of elements to display:none. The smart part here is that it remembers the value of the display property—typically block or inline—before it was changed to none. Conversely, the .show() method restores the matched set of elements to whatever visible display property they had before display:none was applied.
For more information about the display property and how its values are visually represented in a web page, visit the Mozilla Developer Center at https://developer.mozilla.org/en/CSS/display/ and view examples at https://developer.mozilla.org/samples/cssref/display.html.
This feature of .show() and .hide() is especially helpful when hiding elements whose default display property is overridden in a stylesheet. For example, the li element has the property display:block by default, but we might want to change it to display:inline for a horizontal menu. Fortunately, using the .show() method on a hidden element such as one of these li tags would not merely reset it to its default display:block, because that would put the li on its own line. Instead, the element is restored to its previous display:inline state, thus preserving the horizontal design.
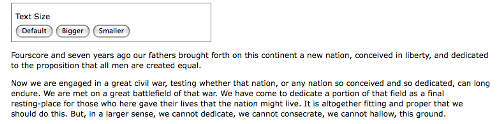
A quick demonstration of these two methods can be set up by adding a second paragraph and a “read more” link after the first paragraph in the example HTML:
<div id="switcher">
<div class="label">Text Size</div>
<button id="switcher-default">Default</button>
<button id="switcher-large">Bigger</button>
<button id="switcher-small">Smaller</button>
</div>
<div class="speech">
<p>Fourscore and seven years ago our fathers brought forth
on this continent a new nation, conceived in liberty,
and dedicated to the proposition that all men are
created equal.
</p>
<p>Now we are engaged in a great civil war, testing whether
that nation, or any nation so conceived and so dedicated,
can long endure. We are met on a great battlefield of
that war. We have come to dedicate a portion of that
field as a final resting-place for those who here gave
their lives that the nation might live. It is altogether
fitting and proper that we should do this. But, in a
larger sense, we cannot dedicate, we cannot consecrate,
we cannot hallow, this ground.
</p>
<a href="#" class="more">read more</a>
</div>
When the DOM is ready, the second paragraph is hidden:
$(document).ready(function() {
$('p:eq(1)').hide();
});
And the speech looks like the following screenshot:

Then, when the user clicks on read more at the end of the first paragraph, that link is hidden and the second paragraph is shown:
$(document).ready(function() {
$('p:eq(1)').hide();
$('a.more').click(function() {
$('p:eq(1)').show();
$(this).hide();
return false;
});
});
Note the use of return false to keep the link from activating its default action. Now the speech looks like this:
The .hide() and .show() methods are quick and useful, but they aren’t very flashy. To add some flair, we can give them a speed.
Effects and Speed
When we include a speed (or, more precisely, a duration) with .show() or .hide(), it becomes animated—occurring over a specified period of time. The .hide(‘speed’) method, for example, decreases an element’s height, width, and opacity simultaneously until all three reach zero, at which point the CSS rule display:none is applied. The .show(‘speed’) method will increase the element’s height from top to bottom, width from left to right, and opacity from 0 to 1 until its contents are completely visible.
Speeding In
With any jQuery effect, we can use one of three preset speeds: ‘slow’, ‘normal’, and ‘fast’. Using .show(‘slow’) makes the show effect complete in .6 seconds, .show(‘normal’) in .4 seconds, and .show(‘fast’) in .2 seconds. For even greater precision we can specify a number of milliseconds, for example .show(850). Unlike the speed names, the numbers are not wrapped in quotation marks.
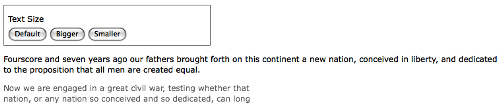
Let’s include a speed in our example when showing the second paragraph of Lincoln’s Gettysburg Address:
$(document).ready(function() {
$('p:eq(1)').hide();
$('a.more').click(function() {
$('p:eq(1)').show('slow');
$(this).hide();
return false;
});
});
When we capture the paragraph’s appearance at roughly halfway through the effect, we see something like the following:
Fading In and Fading Out
While the animated .show() and .hide() methods are certainly flashy, they may at times be too much of a good thing. Fortunately, jQuery offers a couple other pre-built animations for a more subtle effect. For example, to have the whole paragraph appear just by gradually increasing the opacity, we can use .fadeIn(‘slow’) instead:
$(document).ready(function() {
$('p:eq(1)').hide();
$('a.more').click(function() {
$('p:eq(1)').fadeIn('slow');
$(this).hide();
return false;
});
});
This time when we capture the paragraph’s appearance halfway, it’s seen as:
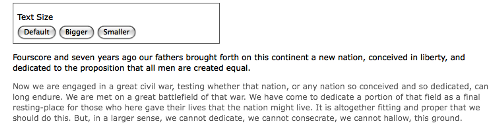
The difference here is that the .fadeIn() effect starts by setting the dimensions of the paragraph so that the contents can simply fade into it. To gradually decrease the opacity we can use .fadeOut().
Compound Effects
Sometimes we have a need to toggle the visibility of elements, rather than displaying them once as we did in the previous example. Toggling can be achieved by first checking the visibility of the matched elements and then attaching the appropriate method. Using the fade effects again, we can modify the example script to look like this:
$(document).ready(function() {
var $firstPara = $('p:eq(1)');
$firstPara.hide();
$('a.more').click(function() {
if ($firstPara.is(':hidden')) {
$firstPara.fadeIn('slow');
$(this).text('read less');
} else {
$firstPara.fadeOut('slow');
$(this).text('read more');
}
return false;
});
});
As we did earlier in the article, we’re caching our selector here to avoid repeated DOM traversal. Notice, too, that we’re no longer hiding the clicked link; instead, we’re changing the its text.
Using an if else statement is a perfectly reasonable way to toggle elements’ visibility. But with jQuery’s compound effects we can leave the conditionals out of it (although, in this example, we still need one for the link text). jQuery provides a .toggle() method, which acts like .show() and .hide(), and like them, can be used with a speed argument or without. The other compound method is .slideToggle(), which shows or hides elements by gradually increasing or decreasing their height. Here is what the script looks like when we use the .slideToggle() method:
$(document).ready(function() {
var $firstPara = $('p:eq(1)');
$firstPara.hide();
$('a.more').click(function() {
$firstPara.slideToggle('slow');
var $link = $(this);
if ( $link.text() == "read more" ) {
$link.text('read less');
} else {
$link.text('read more');
}
return false;
});
});
This time $(this) would have been repeated, so we’re storing it in the $link variable for performance and readability. Also, the conditional statement checks for the text of the link rather than the visibility of the second paragraph, since we’re only using it to change the text.
Creating Custom Animations
In addition to the pre-built effect methods, jQuery provides a powerful .animate() method that allows us to create our own custom animations with fine-grained control. The .animate() method comes in two forms. The first takes up to four arguments:
A map of style properties and values—similar to the .css() map discussed earlier in this article
An optional speed—which can be one of the preset strings or a number of milliseconds
An optional easing type—an advanced option
An optional callback function—which will be discussed later in this article
All together, the four arguments look like this:
.animate({property1: 'value1', property2: 'value2'},
speed, easing, function() {
alert('The animation is finished.');
}
);
The second form takes two arguments, a map of properties and a map of options.
Your ads will be inserted here by
AdSense Now!.
Please go to the plugin admin page to paste your ad code.
.animate({properties}, {options})
In effect, the second argument wraps up the second through fourth arguments of the first form into another map, and adds two more options to the mix. When we adjust the line breaks for readability, the second form looks like this:
.animate({
property1: 'value1',
property2: 'value2'
}, {
duration: 'value',
easing: 'value',
complete: function() {
alert('The animation is finished.');
},
queue: boolean,
step: callback
});
For now we’ll use the first form of the .animate() method, but we’ll return to the second form later in the article when we discuss queuing effects.
Toggling The Fade
When we discussed compound effects, did you notice that not all methods have a corresponding method for toggling? That’s right: while the sliding methods include .slideToggle(), there is no corresponding .fadeToggle() to go along with .fadeIn() and .fadeOut()! The good news is that we can use the .animate() method to easily make our own toggling fade animation. Here we’ll replace the .slideToggle() line of the previous example with our custom animation:
$(document).ready(function() {
$('p:eq(1)').hide();
$('a.more').click(function() {
$('p:eq(1)').animate({opacity: 'toggle'}, 'slow');
var $link = $(this);
if ( $link.text() == "read more" ) {
$link.text('read less');
} else {
$link.text('read more');
}
return false;
});
});
As the example illustrates, the .animate() method provides convenient shorthand values for CSS properties — ‘show’, ‘hide’, and ‘toggle’ — to ease the way when the shorthand methods aren’t quite right for the particular task.
animating Multiple Properties
With the .animate() method, we can modify any combination of properties simultaneously. For example, to create a simultaneous sliding and fading effect when toggling the second paragraph, we simply add the height property-value pair to .animate()’s properties map:
$(document).ready(function() {
$('p:eq(1)').hide();
$('a.more').click(function() {
$('p:eq(1)').animate({
opacity: 'toggle',
height: 'toggle'
},
'slow');
var $link = $(this);
if ( $link.text() == "read more" ) {
$link.text('read less');
} else {
$link.text('read more');
}
return false;
});
});
Additionally, we have not only the style properties used for the shorthand effect methods at our disposal, but also other properties such as: left, top, fontSize, margin, padding, and borderWidth. Recall the script to change the text size of the speech paragraphs. We can animate the increase or decrease in size by simply substituting the .animate() method for the .css() method:
$(document).ready(function() {
var $speech = $('div.speech');
var defaultSize = $speech.css('fontSize');
$('#switcher button').click(function() {
var num = parseFloat( $speech.css('fontSize'), 10 );
switch (this.id) {
case 'switcher-large':
num *= 1.4;
break;
case 'switcher-small':
num /= 1.4;
break;
default:
num = parseFloat(defaultSize, 10);
}
$speech.animate({fontSize: num + 'px'},
'slow');
});
});
The extra properties allow us to create much more complex effects, too. We can, for example, move an item from the left side of the page to the right while increasing its height by 20 pixels and changing its border width to 5 pixels.
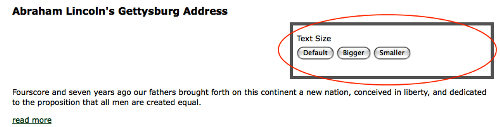
So, let’s do that with the “div id=”switcher” box. Here is what it looks like before we animate it:
With a flexible-width layout, we need to compute the distance that the box needs to travel before it lines up at the right side of the page. Assuming that the paragraph’s width is 100%, we can subtract the Text Size box’s width from the paragraph’s width. While jQuery’s .width() method would usually come in handy for such calculations, it doesn’t factor in the width of the right and left padding or the right and left border. As of jQuery version 1.2.6, though we also have the .outerWidth() method at our disposal. This is what we’ll use here, to avoid having to add padding and border widths as well. For the sake of this example, we’ll trigger the animation by clicking the Text Size label, just above the buttons. Here is what the code should look like:
$(document).ready(function() {
$('div.label').click(function() {
var paraWidth = $('div.speech p').outerWidth();
var $switcher = $(this).parent();
var switcherWidth = $switcher.outerWidth();
$switcher.animate({left: paraWidth - switcherWidth,
height: '+=20px', borderWidth: '5px'}, 'slow');
});
});
Note that the height property has += before the pixel value. This expression, introduced in jQuery 1.2, indicates a relative value. So, instead of animating the height to 20 pixels, the height is animated to 20 pixels greater than the current height.
Although this code successfully increases the height of the “div” and widens its border, at the moment the left position cannot be changed. We still need to enable changing its position in the CSS.
Positioning With CSS
When working with .animate(), it’s important to keep in mind the limitations that CSS imposes on the elements that we wish to change. For example, adjusting the left property will have no effect on the matching elements unless those elements have their CSS position set to relative or absolute. The default CSS position for all block-level elements is static, which accurately describes how those elements will remain if we try to move them without first changing their position value.
For more information on absolute and relative positioning, see Joe Gillespie’s article, Absolutely Relative at: http://www.wpdfd.com/issues/78/absolutely_relative/
A peek at our stylesheet shows that we have now set div id switcher to be relatively positioned:
#switcher { position: relative; }
With the CSS taken into account, the result of clicking on Text Size, when the animation has completed, will look like this:
Simultaneous Versus Queued Effects
The .animate() method, as we’ve just discovered, is very useful for creating simultaneous effects in a particular set of elements. There may be times, however, when we want to queue our effects, having them occur one after the other.
Working With A Single Set Of Elements
When applying multiple effects to the same set of elements, queuing is easily achieved by chaining those effects. To demonstrate this queuing, we’ll again move the Text Size box to the right, increase its height and increase its border width. This time, however, we perform the three effects sequentially, simply by placing each in its own .animate() method and chaining the three together:
$(document).ready(function() {
$('div.label').click(function() {
var paraWidth = $('div.speech p').outerWidth();
var $switcher = $(this).parent();
var switcherWidth = $switcher.outerWidth();
$switcher
.animate({left: paraWidth - switcherWidth},
'slow')
.animate({height: '+=20px'}, 'slow')
.animate({borderWidth: '5px'}, 'slow');
});
});
Chaining permits us to keep all three .animate() methods on the same line, but here we have indented them and put each on its own line for greater readability.
We can queue any of the jQuery effect methods, not just .animate(), by chaining them. We can, for example, queue effects on div id switcher in the following order:
Fade its opacity to .5 with .fadeTo().
Move it to the right with .animate().
Fade it back in to full opacity with .fadeTo().
Hide it with .slideUp().
Show it once more with .slideDown().
All we need to do is chain the effects in the same order in our code:
$(document).ready(function() {
$('div.label').click(function() {
var paraWidth = $('div.speech p').outerWidth();
var $switcher = $(this).parent();
var switcherWidth = $switcher.outerWidth();
$switcher
.fadeTo('fast',0.5)
.animate({
'left': paraWidth - switcherWidth
}, 'slow')
.fadeTo('slow',1.0)
.slideUp('slow')
.slideDown('slow');
});
});
But what if we want to move the div to the right at the same time as it fades to half opacity? If the two animations were occurring at the same speed, we could simply combine them into a single .animate() method. But in this example, the fade is using the ‘fast’ speed while the move to the right is using the ‘slow’ speed. Here is where the second form of the .animate() method comes in handy:
$(document).ready(function() {
$('div.label').click(function() {
var paraWidth = $('div.speech p').outerWidth();
var $switcher = $(this).parent();
var switcherWidth = $switcher.outerWidth();
$switcher
.fadeTo('fast',0.5)
.animate({
'left': paraWidth - switcherWidth
}, {duration: 'slow', queue: false})
.fadeTo('slow',1.0)
.slideUp('slow')
.slideDown('slow');
});
});
The second argument, an options map, provides the queue option, which when set to false makes the animation start simultaneously with the previous one.
One final observation about queuing effects on a single set of elements is that queuing does not automatically apply to other, non-effect methods such as .css(). So let’s suppose we wanted to change the background color of “div id=”switcher” to red after the .slideUp() but before the slideDown(). We could try doing it like this:
$(document).ready(function() {
$('div.label').click(function() {
var paraWidth = $('div.speech p').outerWidth();
var $switcher = $(this).parent();
var switcherWidth = $switcher.outerWidth();
$switcher
.fadeTo('fast',0.5)
.animate({
'left' paraWidth - switcherWidth
}, 'slow')
.fadeTo('slow',1.0)
.slideUp('slow')
.css('backgroundColor','#f00')
.slideDown('slow');
});
});
However, even though the background-changing code is placed at the correct position in the chain, it occurs immediately upon the click.
One way we can add non-effect methods to the queue is to use the appropriately named .queue() method. Here is what it would look like in our example:
$(document).ready(function() {
$('div.label').click(function() {
var paraWidth = $('div.speech p').outerWidth();
var $switcher = $(this).parent();
var switcherWidth = $switcher.outerWidth();
$switcher
.fadeTo('fast',0.5)
.animate({
'left': paraWidth - switcherWidth
}, 'slow')
.fadeTo('slow',1.0)
.slideUp('slow')
.queue(function() {
$switcher
.css('backgroundColor', '#f00')
.dequeue();
})
.slideDown('slow');
});
});
When given a callback function, as it is here, the .queue() method adds the function to the queue of effects for the matched elements. Within the function, we set the background color to red and then add the corollary .dequeue() method. Including this .dequeue() method allows the animation queue to pick up where it left off and complete the chain with the following .slideDown(‘slow’) line. If we hadn’t used .dequeue(), the animation would have stopped.
More information and examples for .queue() and .dequeue() are available at http://docs.jquery.com/Effects.
We’ll discover another way to queue non-effect methods as we examine effects with multiple sets of elements.
Working With Multiple Sets Of Elements
Unlike with a single set of elements, when we apply effects to different sets, they occur at virtually the same time. To see these simultaneous effects in action, we’ll slide one paragraph down while sliding another paragraph up. First, we’ll add the remaining portion of the Gettysburg Address to the HTML, dividing it into two separate paragraphs:
<div id="switcher">
<div class="label">Text Size</div>
<button id="switcher-default">Default</button>
<button id="switcher-large">Bigger</button>
<button id="switcher-small">Smaller</button>
</div>
<div class="speech">
<p>Fourscore and seven years ago our fathers brought forth
on this continent a new nation, conceived in liberty, and
dedicated to the proposition that all men are created
equal.
</p>
<p>Now we are engaged in a great civil war, testing whether
that nation, or any nation so conceived and so dedicated,
can long endure. We are met on a great battlefield of
that war. We have come to dedicate a portion of that
field as a final resting-place for those who here gave
their lives that the nation might live. It is altogether
fitting and proper that we should do this. But, in a
larger sense, we cannot dedicate, we cannot consecrate,
we cannot hallow, this ground.
</p>
<a href="#" class="more">read more</a>
<p>The brave men, living and dead, who struggled
here have consecrated it, far above our poor
power to add or detract. The world will little
note, nor long remember, what we say here, but it
can never forget what they did here. It is for us
the living, rather, to be dedicated here to the
unfinished work which they who fought here have
thus far so nobly advanced.
</p>
<p>It is rather for us to be here dedicated to the
great task remaining before us—that from
these honored dead we take increased devotion to
that cause for which they gave the last full
measure of devotion—that we here highly
resolve that these dead shall not have died in
vain—that this nation, under God, shall
have a new birth of freedom and that government
of the people, by the people, for the people,
shall not perish from the earth.
</p>
</div>
Next, to help us see what’s happening during the effect, we’ll give the third paragraph a 1-pixel border and the fourth paragraph a gray background. We’ll also hide the fourth paragraph when the DOM is ready:
$(document).ready(function() {
$('p:eq(2)').css('border', '1px solid #333');
$('p:eq(3)').css('backgroundColor', '#ccc').hide();
});
Finally, we’ll add the .click() method to the third paragraph so that when it is clicked, the third paragraph will slide up (and out of view), while the fourth paragraph slides down (and into view):
$(document).ready(function() {
$('p:eq(2)')
.css('border', '1px solid #333')
.click(function() {
$(this).slideUp('slow')
.next().slideDown('slow');
});
$('p:eq(3)').css('backgroundColor', '#ccc').hide();
});
A screenshot of these two effects in mid-slide confirms that they do, indeed, occur virtually simultaneously:

The third paragraph, which started visible, is halfway through sliding up at the same time as the fourth paragraph, which started hidden, is halfway through sliding down.
Callbacks
In order to allow queuing effects on different elements, jQuery provides a callback function for each effect method. As we have seen with event handlers and with the .queue() method, callbacks are simply functions passed as method arguments. In the case of effects, they appear as the last argument of the method.
If we use a callback to queue the two slide effects, we can have the fourth paragraph slide down before the third paragraph slides up. Let’s first look at how to set up the .slideDown() method with the callback:
$(document).ready(function() {
$('p:eq(2)')
.css('border', '1px solid #333')
.click(function() {
$(this).next().slideDown('slow',function() {
// code here executes after 3rd paragraph's
// slide down has ended
});
});
$('p:eq(3)').css('backgroundColor', '#ccc').hide();
});
We do need to be careful here, however, about what is actually going to slide up. The context has changed for $(this) because the callback is inside the .slideDown() method. Here, $(this) is no longer the third paragraph, as it was at the point of the .click() method; rather, since the .slideDown() method is attached to $(this).next(), everything within that method now sees $(this) as the next sibling, or the fourth paragraph. Therefore, if we put $(this).slideUp(‘slow’) inside the callback, we would end up hiding the same paragraph that we had just made visible.
A simple way to keep the reference of $(this) stable is to store it in a variable right away within the .click() method, like var $thirdPara = $(this).
Now $thirdPara will refer to the third paragraph, both outside and inside the callback. Here is what the code looks like using our new variable:
$(document).ready(function() {
var $thirdPara = $('p:eq(2)');
$thirdPara
.css('border', '1px solid #333')
.click(function() {
$(this).next().slideDown('slow',function() {
$thirdPara.slideUp('slow');
});
});
$('p:eq(3)').css('backgroundColor', '#ccc').hide();
});
Using $thirdPara inside the .slideDown() callback relies on the properties of closures.
This time a snapshot halfway through the effects will reveal that both the third and the fourth paragraphs are visible; the fourth has finished sliding down and the third is about to begin sliding up:

Now that we’ve discussed callbacks, we can return to the code from earlier in this article in which we queued a background-color change near the end of a series of effects. Instead of using the .queue() method, as we did earlier, we can simply use a callback function:
$(document).ready(function() {
$('div.label').click(function() {
var paraWidth = $('div.speech p').outerWidth();
var $switcher = $(this).parent();
var switcherWidth = $switcher.outerWidth();
$switcher
.fadeTo('slow',0.5)
.animate({
'left': paraWidth - switcherWidth
}, 'slow')
.fadeTo('slow',1.0)
.slideUp('slow', function() {
$switcher
.css('backgroundColor', '#f00');
})
.slideDown('slow');
});
});
Here again, the background color of div id switcher changes to red after it slides up, and before it slides back down.
In a Nutshell
With all the variations to consider when applying effects, it can become difficult to remember whether the effects will occur simultaneously or sequentially. A brief outline might help:
Effects on a single set of elements are:
– simultaneous when applied as multiple properties in a single .animate() method.
– queued when applied in a chain of methods, unless the queue option is set to false.
Effects on multiple sets of elements are:
– simultaneous by default
– queued when applied within the callback of another effect or within the callback of the .queue() method
Summary
By using effect methods that we have explored in this article, we should now be able to incrementally increase and decrease text size by using either the .css() or the .animate() method. We should also be able to apply various effects to gradually hide and show page elements in different ways and also to animate elements, simultaneously or sequentially, in a number of ways.
Your ads will be inserted here by
AdSense Now!.
Please go to the plugin admin page to paste your ad code.