Hi! In this tutorial you will learn how to create an external Asus Lamborghini Hdd icon using some easy techniques, hope you`ll like it!
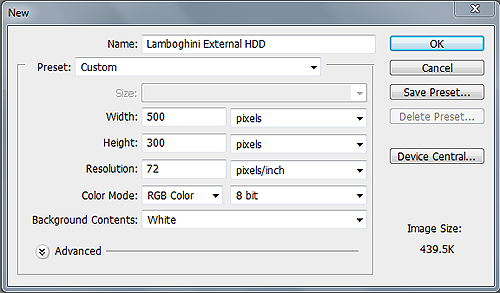
Step1: Create a new document
Begin by creating a New Document 500 px x 300 px.
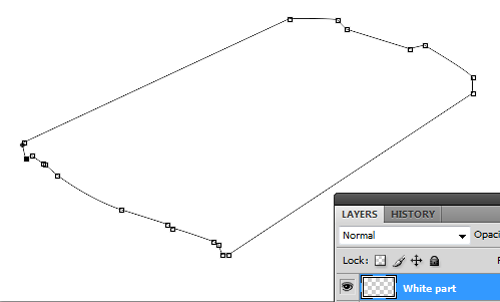
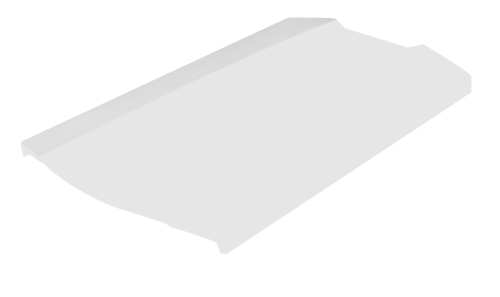
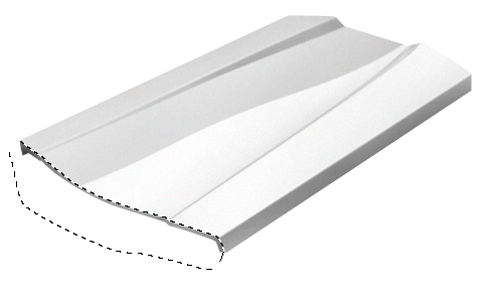
Step2: Hard Disk shape
Use Pen Tool (P) to create the Hard disk shape
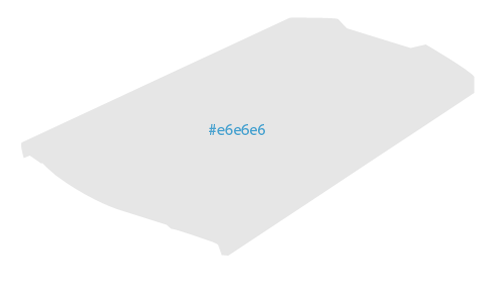
Fill the path created above with a lighten gray, i used #e6e6e6.
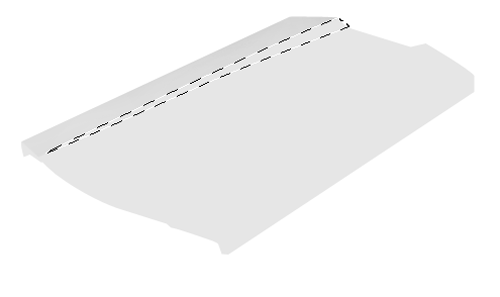
Step3: Adding Shadows
Create next selection using a selection tool (The main tool that we will use is Pen tool (P) to create selections, as it is a much more versatile tool than the lasso tool. It can be tricky to use the first couple of times, but with practice it turns into a very handy tool. I use 0.3 feather when creating selections, and have the anti-aliased button checked, so no jagged edges appear.)
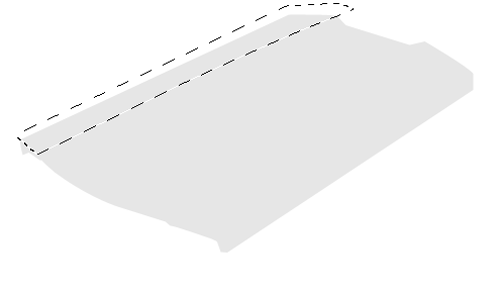
Add some shadows in the selection created above using Burn Tool (O)t
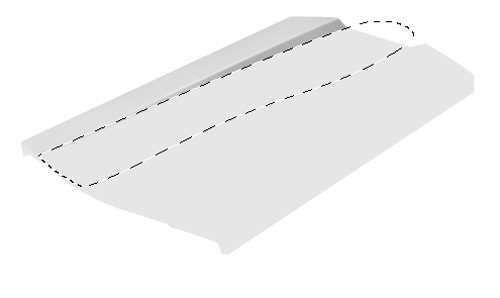
Step 4
Make another selection using Pen Tool (P)
Use Burn Tool (O) and add some shadows in the selection

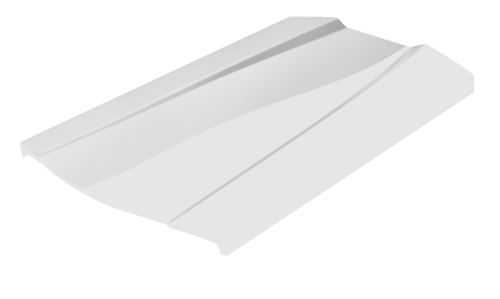
Strokes
Use Stroke Path technique and add a 2px white stroke like i did in the picture below.

Erase using Eraser Tool (E) to obtain a better effect

Step 5
Make next selection using a selection tool
Use Burn Tool (O) and add some shadows in the selection.

Step 6
Again, do a selection like i did in the next picture

Add some shadows using Burn Tool (O).
Step 7: Reflections
Now, we`re going to creating some reflections on our Hard disk icon, make next selection using Pen Tool (P)
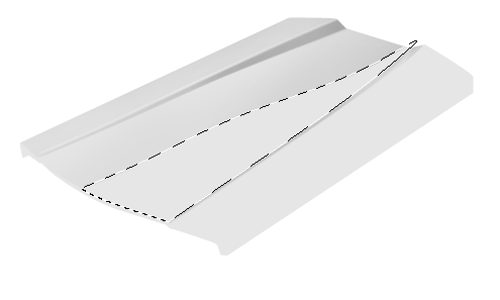
Pick up Dodge Tool and add some highlights in the selection
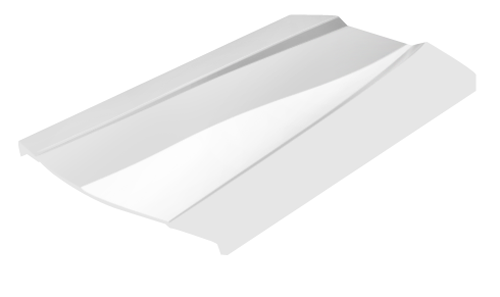
Repeat the same techniques one more time.


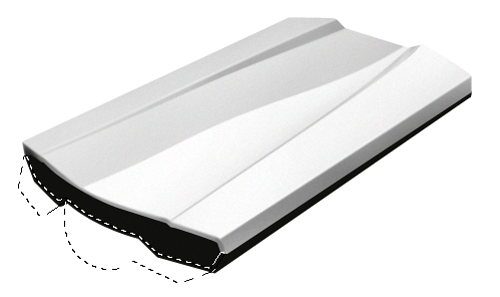
Step 8: Hard disk sides
Select the side of our Hard disk using Pen Tool (P)

And add some shadows using Burn Tool like i did below

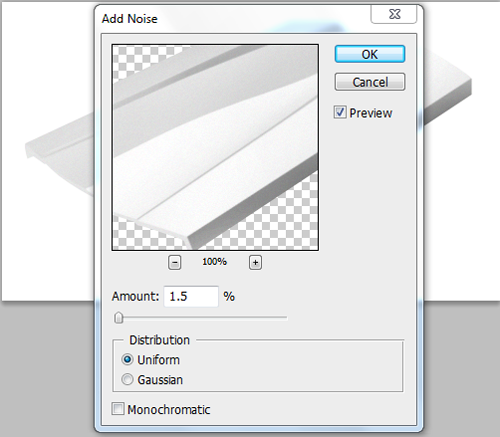
Noise
In the same selection, add some noise ( Go to Filter->Noise->Add Noise 1.5% )
Step 9: Strokes
Use Pen Tool (P) and create next path, then add a 2px white stroke
 9a.png
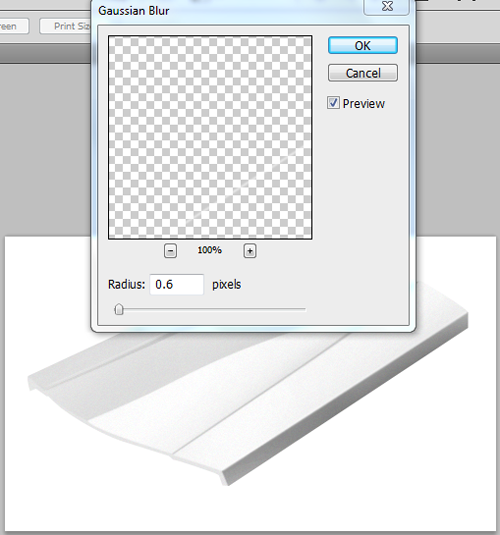
Go to Filter->Blur->Gaussian blur and make the settings below
Make a selection like i did below and add shadows on it using Burn Tool (O)
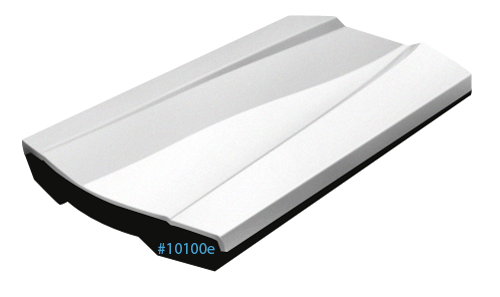
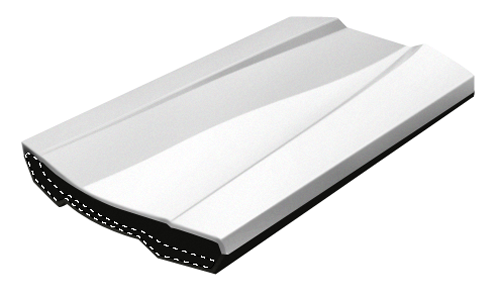
Step 10: Bottom part
Into a new layer, over the background layer make next path using Pen Tool (P)
Fill the path
Fill the path created above a dark gray color, i used #10100e
Noise
Now go to Filter->Noise->Add noise and make next settings

Step 11:Ligths
Make next selection using a selection tool
In the selection created above add some light using Dodge TOol (o)

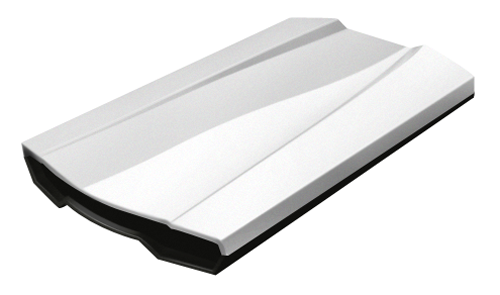
Step 12
Repeat the step 11.

Step 13:Decrease the opacity
Create a path like i did in the next image using Pen Tool (P) and add a 1 px white stroke

Lights, again
Erase using Eraser Tool (E) or decrease the opacity of the stroke for a better effect.
Step 14
Make next selection using a selection tool
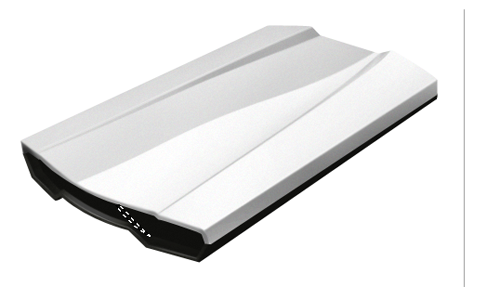
Add some light using Dodge Tool (O) in the selection created above like i did in the picture below.

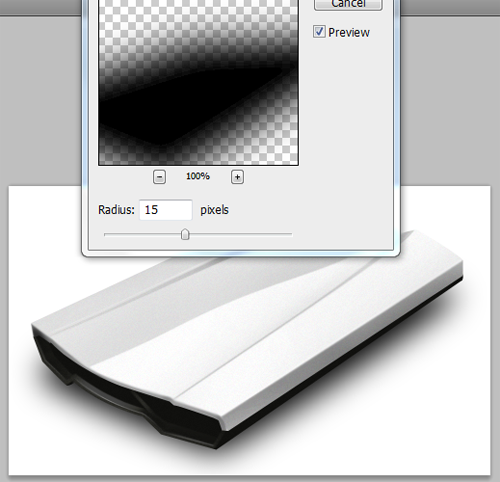
Step 15:Shadow of the hard disk
Into a new layer called “Shadow” make a path like i did using Pen Tool (P) and fill it with black color

Now go to Filter->Blur->Gaussian Blur and make the settings below for a better effect
Final
