Your ads will be inserted here by
AdSense Now!.
Please go to the plugin admin page to paste your ad code.
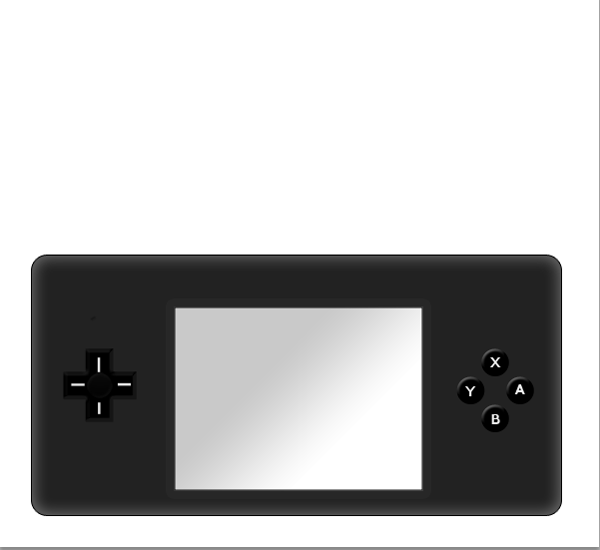
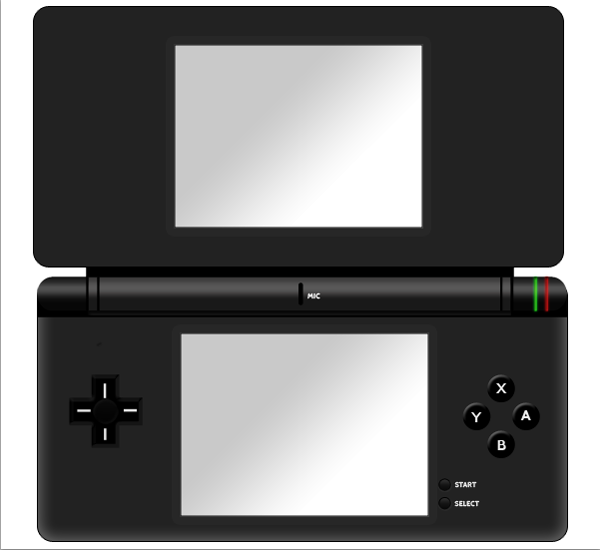
Today we are going to be using basic layer styling and some basic tools in Photoshop to create the open version of our Nintendo DS. In this tutorial you will learn to create the open view of a DS from scratch, using nothing but basic tools and filters. Now, let’s get started. As always this is what we will be creating:

Alright, to start out creating the open version of our Nintendo DS you will need to create a new document that is 1200px by 1100px and fill it with white.
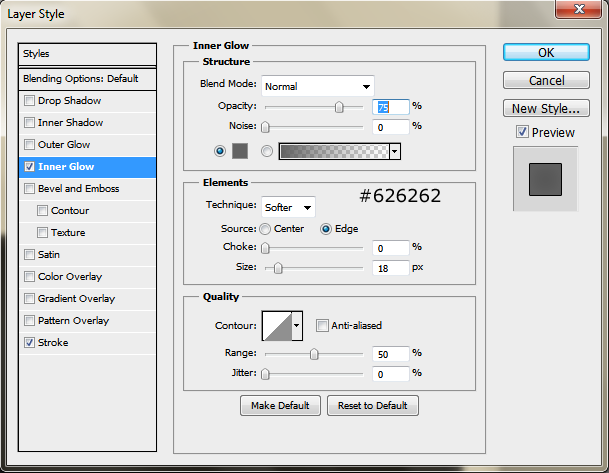
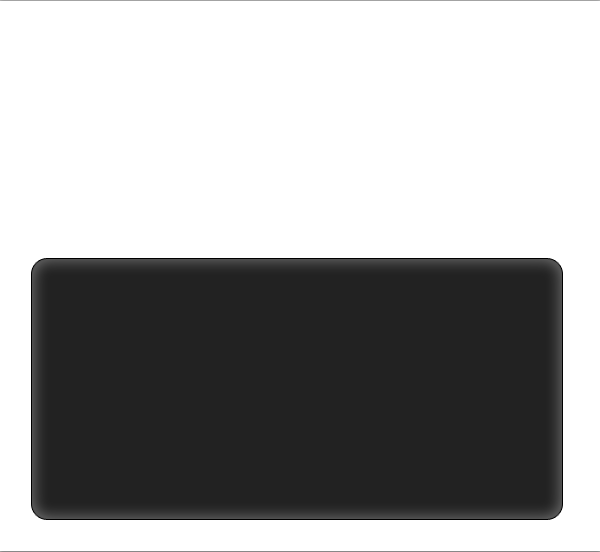
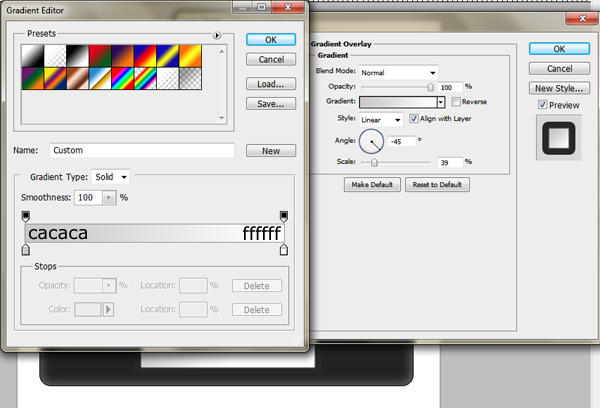
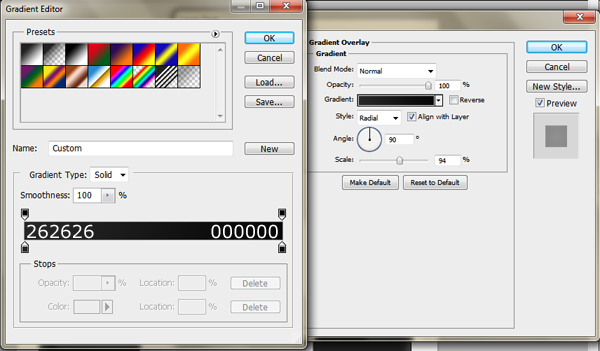
Now grab your rounded rectangle tool and set the radius to 15px and choose #232323 for your foreground color. Drag out a rectangle that is 530px (w) by 260px (h).
-insert image-
NOTE: These are the same settings that we used for our closed version of the first Nintendo DS tutorial. We will be using a lot of the settings from the first tutorial so if you haven’t followed it you should.
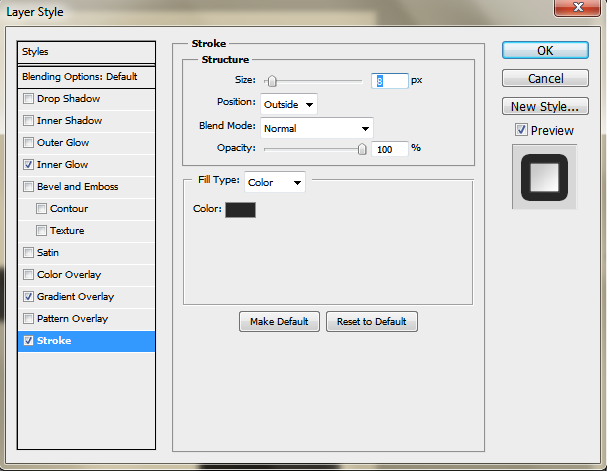
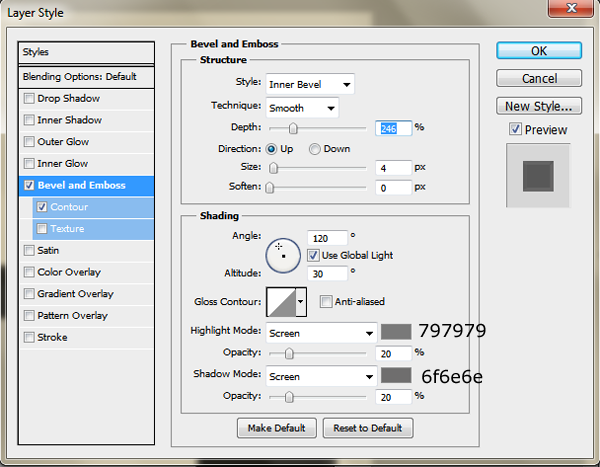
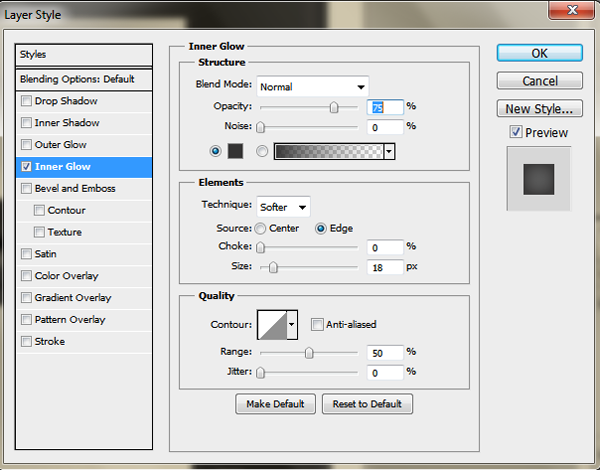
Now apply the following settings:

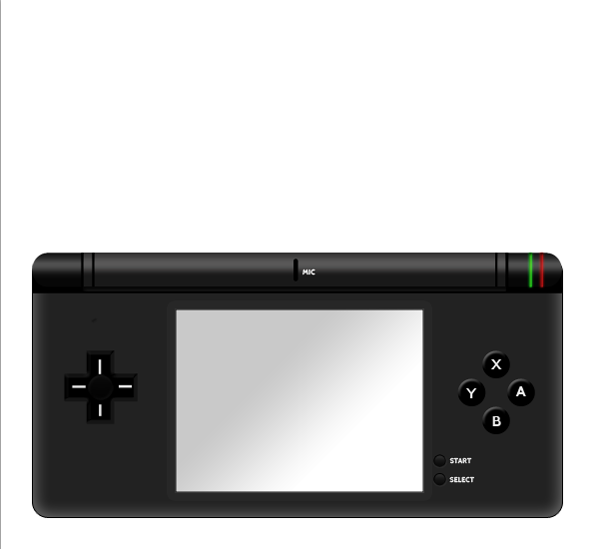
You should have something like this:
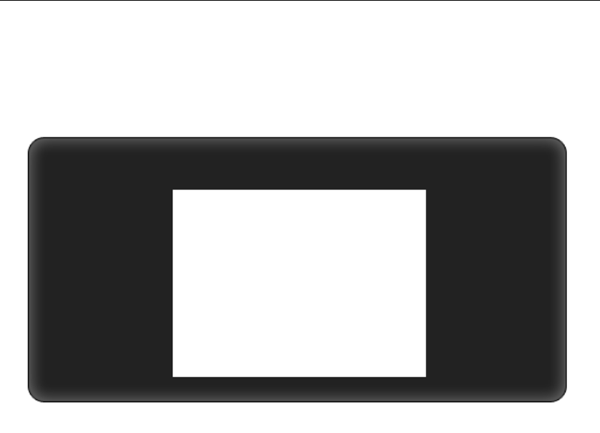
Grab your rectangle marquee tool and drag out a rectangle that is 250px by 185px. Create a new layer and fill it with white. Now center your rectangle horizantally on your rounded rectangle and space it 25px from the bottom of your rectangle.
You should have something like this:
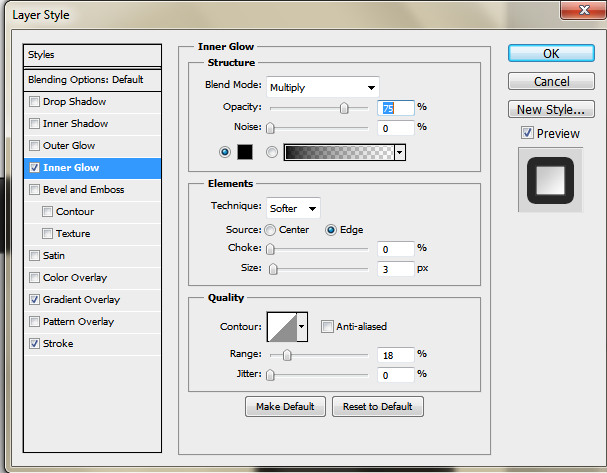
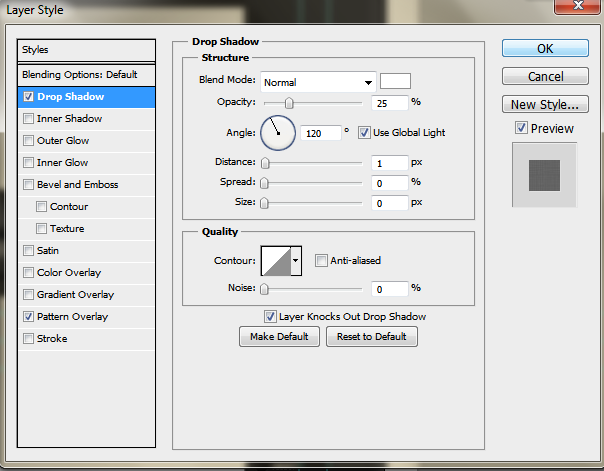
Now to finish it off we need to apply a few layer styles.
Awesome! Now we are ready to move forward to adding our joystick. Our joystick is going to be a mixture of simple elements and shapes, with a few layer styles added in for depth.
Grab your rectangle marquee tool and create a selection that is 28px (w) by 74px (h). Create a new layer and fill it with straight black. Now duplicate your layer and enter free transform mode (Ctrl+T) and rotate the rectangle to be horizantal instead of vertical. The two shapes should create a cross for our joystick and be spaced 40px from our screen. Like this:

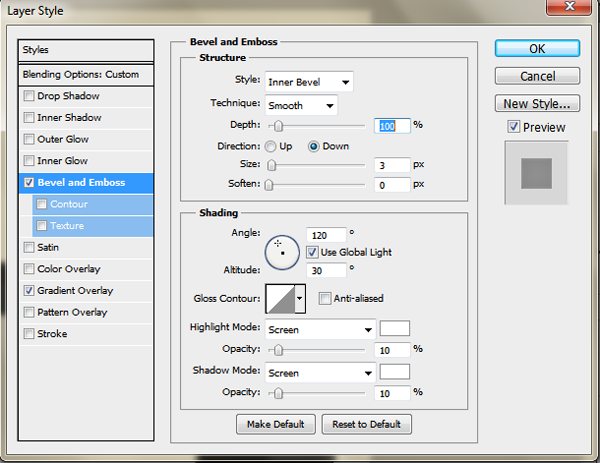
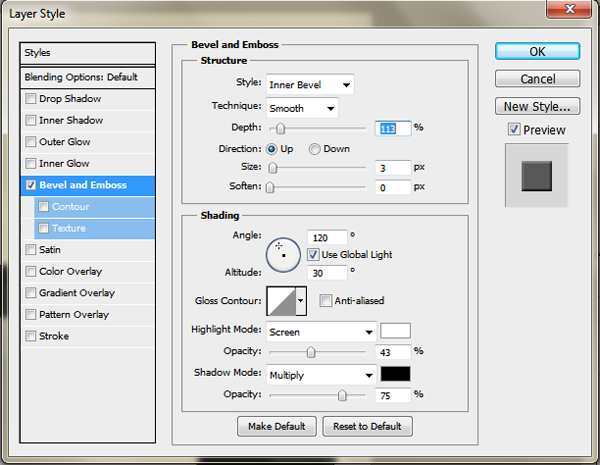
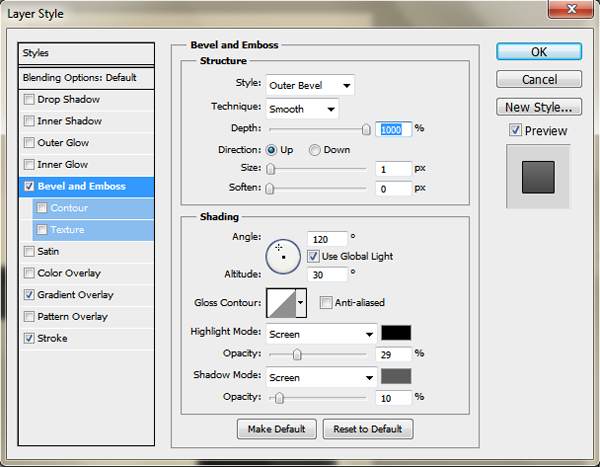
Now apply the following Bevel and Emboss Layer style to give it some depth.
Alright, time for a little more depth. Grab your ecliptical marquee tool and create a perfect 25px circle in the center of your joystick and create a new layer. Fill it with #232323.

Alright, now lower your layer opacity to 40% and apply the following layer styles:
For the final part of joystick we are going to be using our line tool, with 2px for the size. Set your foreground color to #e5e5e5 and draw out a 15px tall line, four times. The lines need to be placed at the beginning of our circle we just drew on each of our four sides.

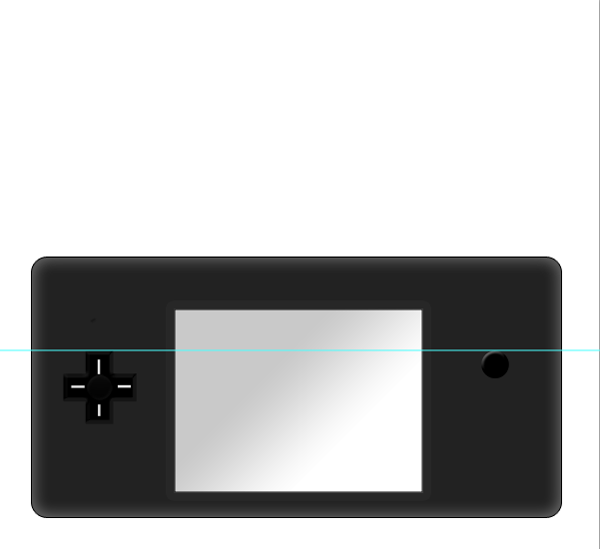
Really quick we need to set up a ruler for the next part. Drag your ruler down to be in line with the top of your joystick. If your rulers aren’t activated just hit Ctrl+R and drag down a ruler.

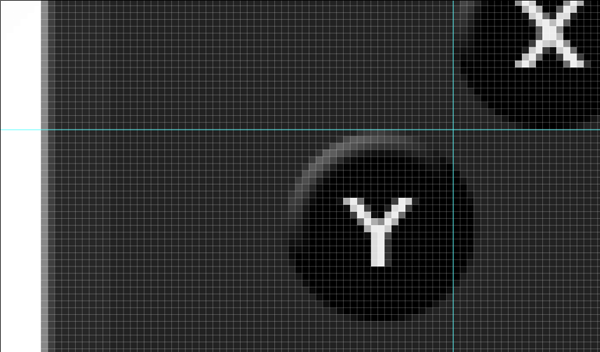
Sweet! Now we need to start on our buttons. Grab your ecliptical marquee tool and drag out a perfect 28px circle. Create a new layer and fill your selection with black. Space your icon 60px from our screen (not including the stroke) and the top lined up with our ruler.

Now apply the following layer style:
Your ads will be inserted here by
AdSense Now!.
Please go to the plugin admin page to paste your ad code.
Now, grab your text tool and choose whatever font you want, I am using Cabin by Google Fonts. Type out x, lowercase, with the color set to #eeeeee. Center it on your button so you have this-

Quickly we need to set up some rulers for our button. Just set up three more rulers that end at each side of our button so the rulers create a square around our button. Like this:
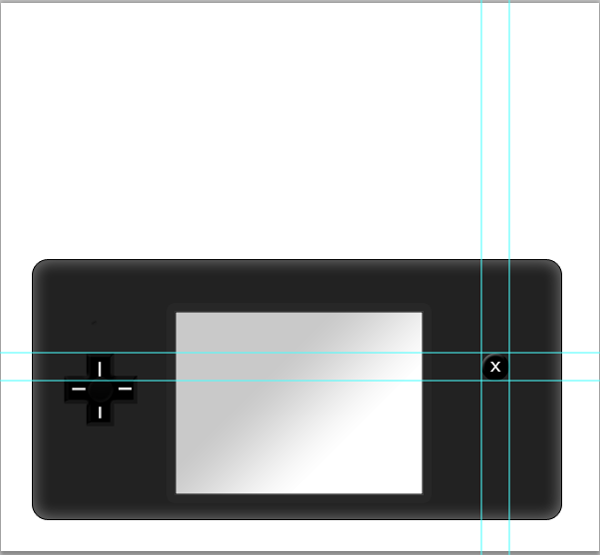
Now duplicate your layers and move them down and to the left. The second button should have the top line up with our x button bottom ruler and overlap 3px from our x button left ruler.
Now duplicate your layers two more times and line them up the same. Be sure to change the text on the buttons to be BA and Y. You should have this:
Alright, create a new layer and grab your ecliptical marquee tool again and create a perfect 10px tool and fill your selection with black.
Space your layer in line with the stroke on our screen and 25px from the bottom of our screen. Now apply the following layer styles:
With your gradient overlay drag it up a little bit to give it an easy, simple lighting effect. Now you should have a super awesome start button.

Now grab your text tool again, using the same font, but go all caps this time and type out START, with the same #eeeeee color we used before. Give it a nice 2px spacing from your button.
Duplicate your layers and move them down 5px. Change your text to select and the bottom of our layer is almost complete.

For the final piece to the top of our icon you need to open up the first PSD of your Nintendo DS from tutorial one and drag over our “top bar”, which is the bar containing the lights and hinges.
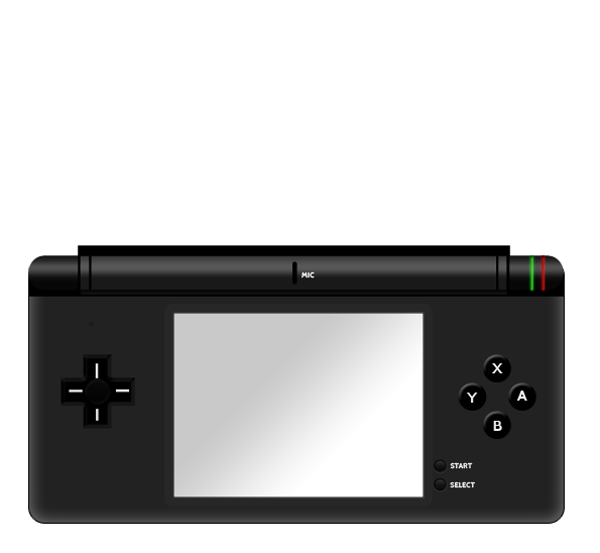
Place the top bar in line with our rectangle so that you have a nice bottom like this:
Create a new layer and draw out a rectangle that is 430px by 10px tall, filled with black, and space it at the top of our hinge bar, in between our first and last hinge line.
The top have is super easy. Duplicate your starting layer and the screen layer only and move them up until it is inline with the spacer layer we just created. Take off the inner glow of our main layer and move the screen up to be centered.
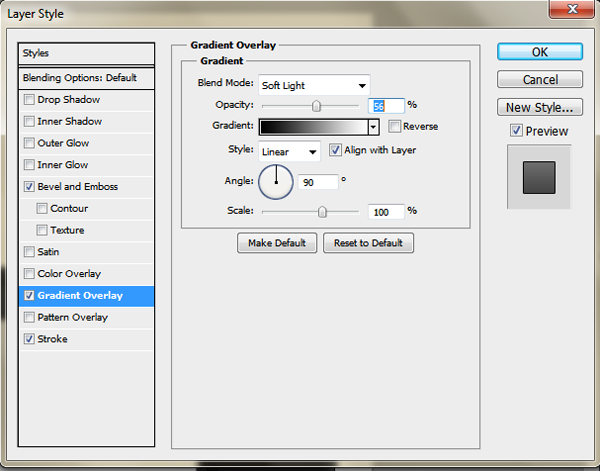
Now, duplicate your main layer again and use CTRL+T. Change your width and height to 95% and complete the transformation. Center it in your outer layer, if its not already, and apply the following layer style.
Create a new layer and create a perfect 10px circle and fill it with black. Now apply the following layer style to it-
NOTE: I have applied a simple pattern overlay to the speakers as well but it is not a main piece of the tutorial because most of the time this DS will be shrunk down too low to see the textures.
Duplicate your layer to make a set of speakers, three on top and three on bottom, with even spacing. Center it on the left side of your screen. Duplicate the layers and center it again on the right side and you are finished with your DS.
Your ads will be inserted here by
AdSense Now!.
Please go to the plugin admin page to paste your ad code.